Authenticating client with SSL/TLS certificate
Based on the Kaa v1.2.
Time to complete: 10 min.
Overview
Welcome to the sixth tutorial in the Kaa getting started guide!
From this tutorial you will learn some additional concepts of the Kaa platform and discover how to:
- communicate with the platform over one-way and two-way (mutual) MQTT over SSL/TLS
- authenticate client (or device) using X.509 certificate
- suspend/revoke/reactivate client X.509 certificate
One-way SSL/TLS communication
In one-way SSL, it is the task of the client to validate the server and ensure that the received data comes from the right source.
After accepting the connection on MQTT over a TLS port (8883 by default), the Kaa server sends its public certificate to the client.
Then the client validates the received certificate through either a certification authority (CA) or its own trust store.
Playbook
Let’s play with one-way SSL/TLS communication by connecting an MQTT client to the 8883 port, which serves MQTT over TLS.
Do not confuse 8883 with the 1883 port, which, by contrast, serves plain, non-encrypted MQTT.
We assume that you have already created an application, application version, and endpoint with a token while following the “connecting your first device” tutorial. You can reuse them or create new ones.
Start by logging into your Kaa Cloud account.
To obtain the Kaa server root certificate, go to the Device management, then Credentials, click Get root certificate, and copy the certificate content.
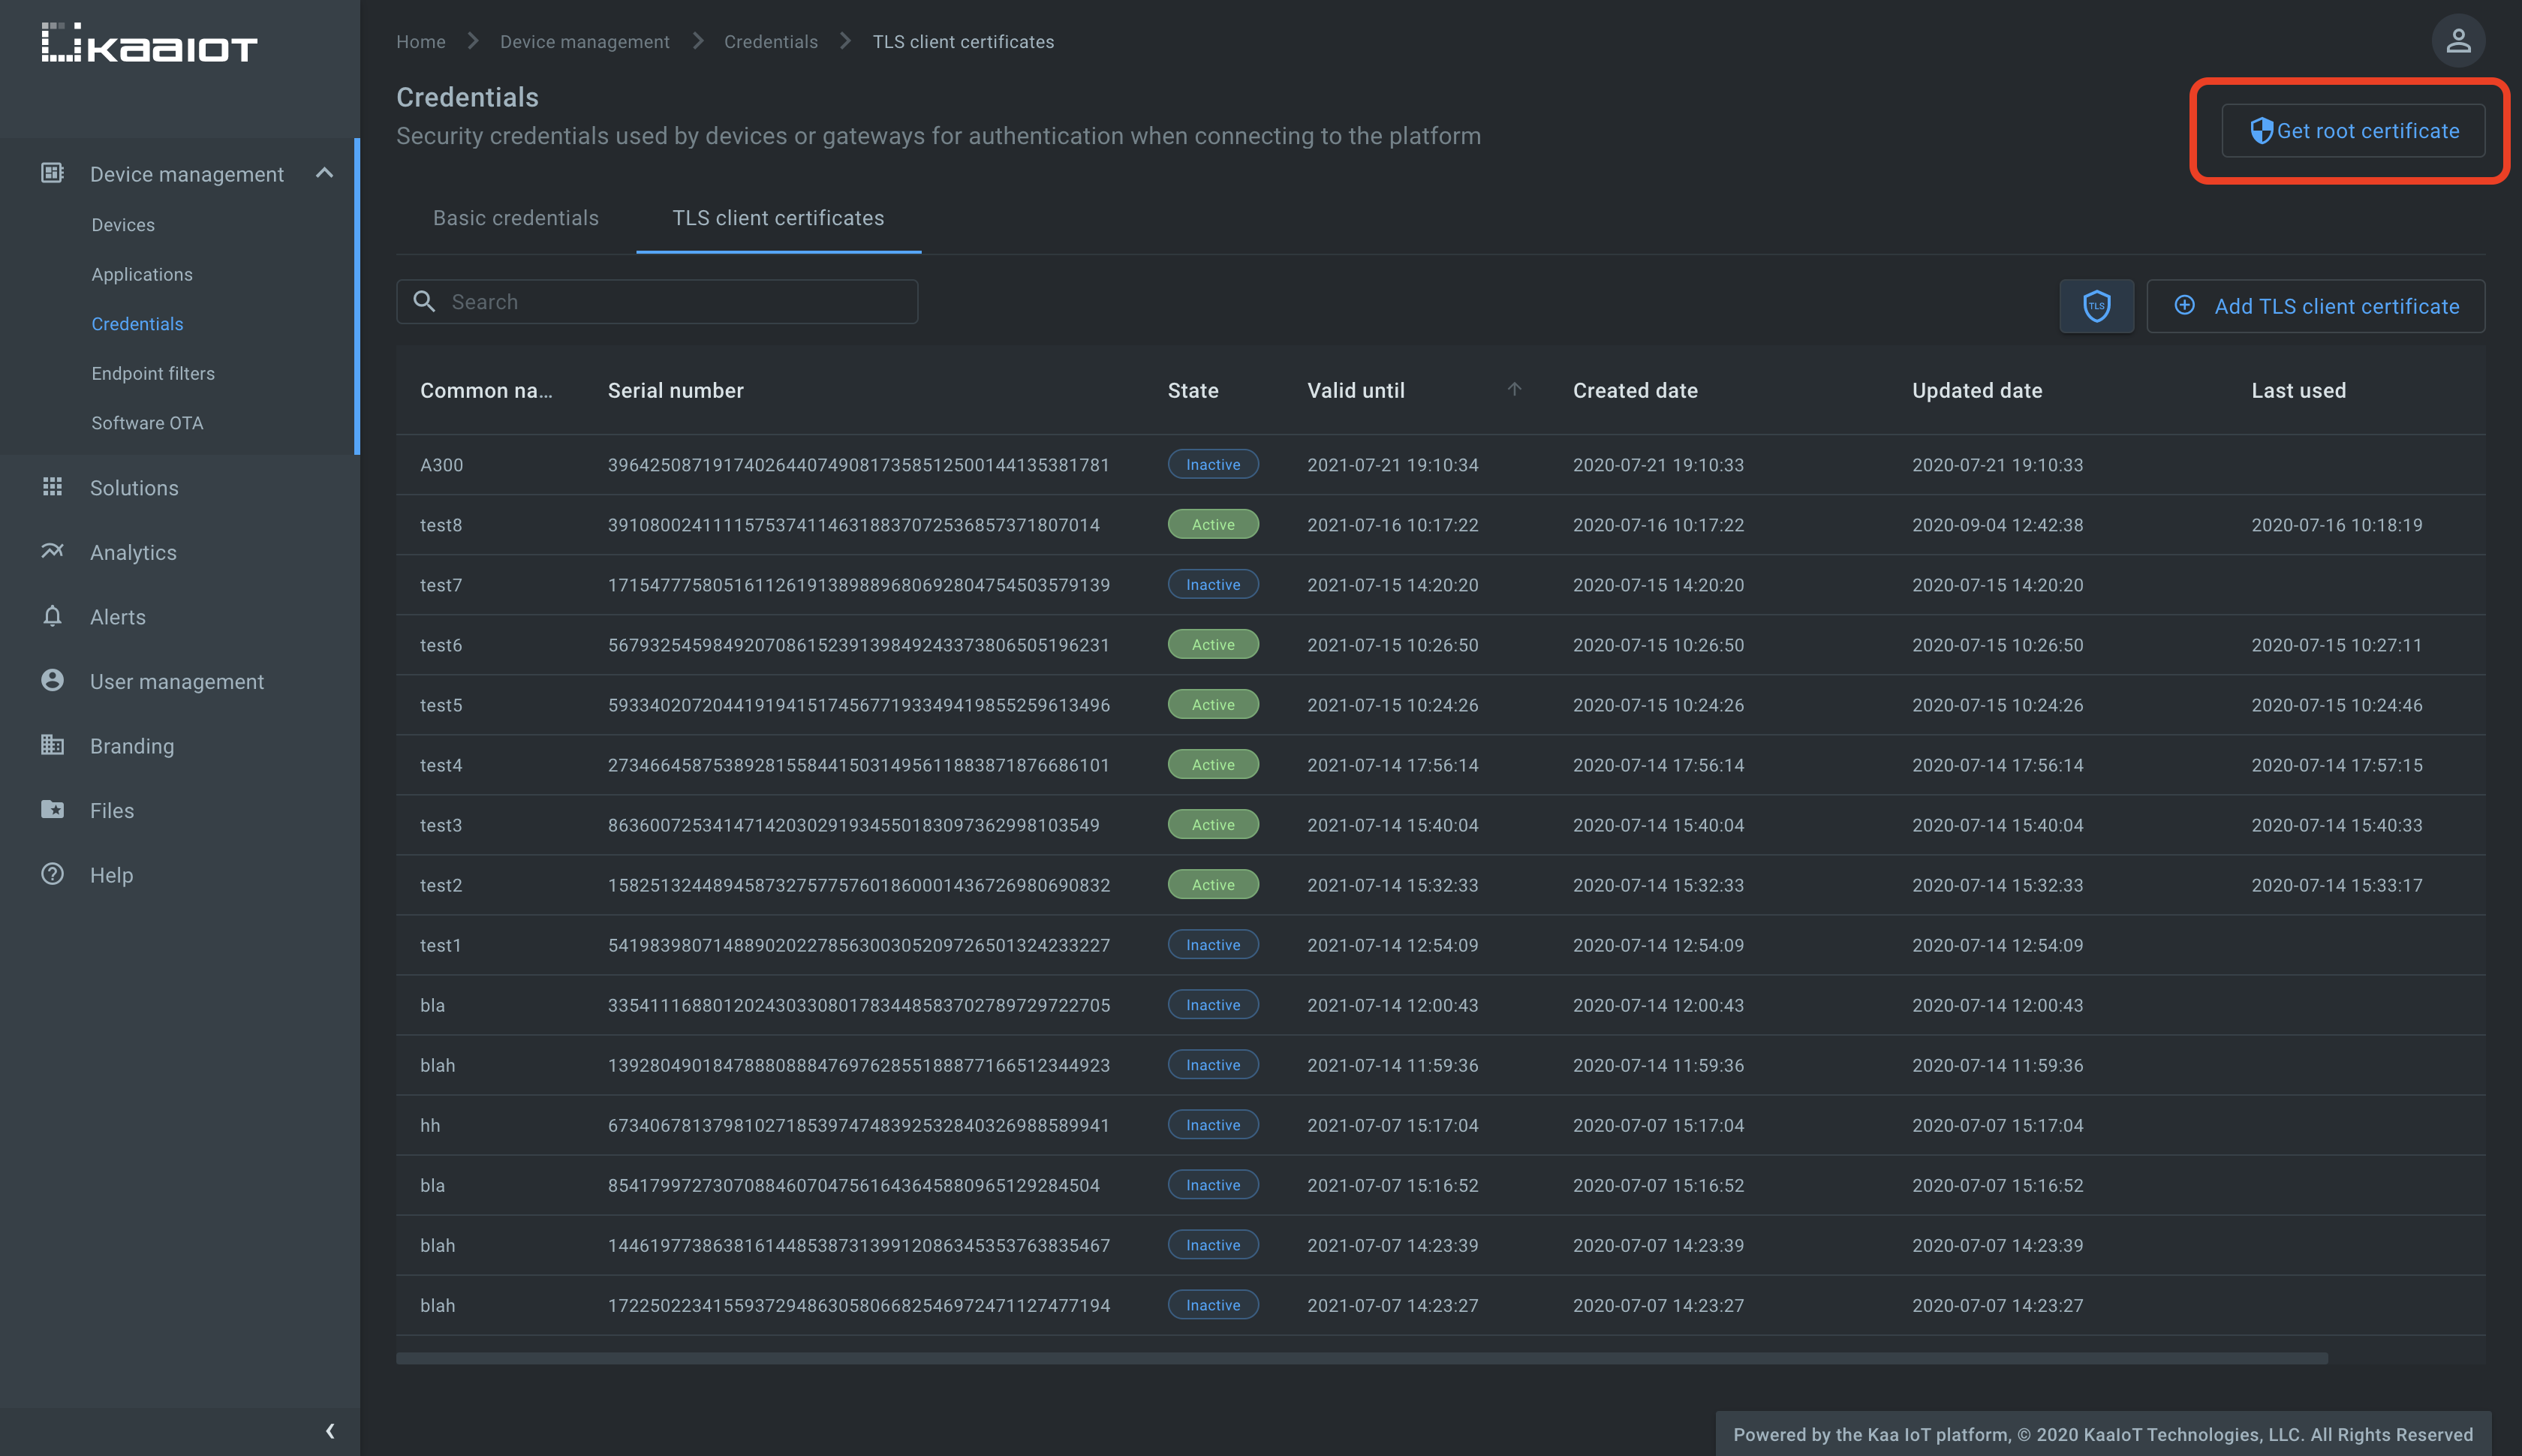
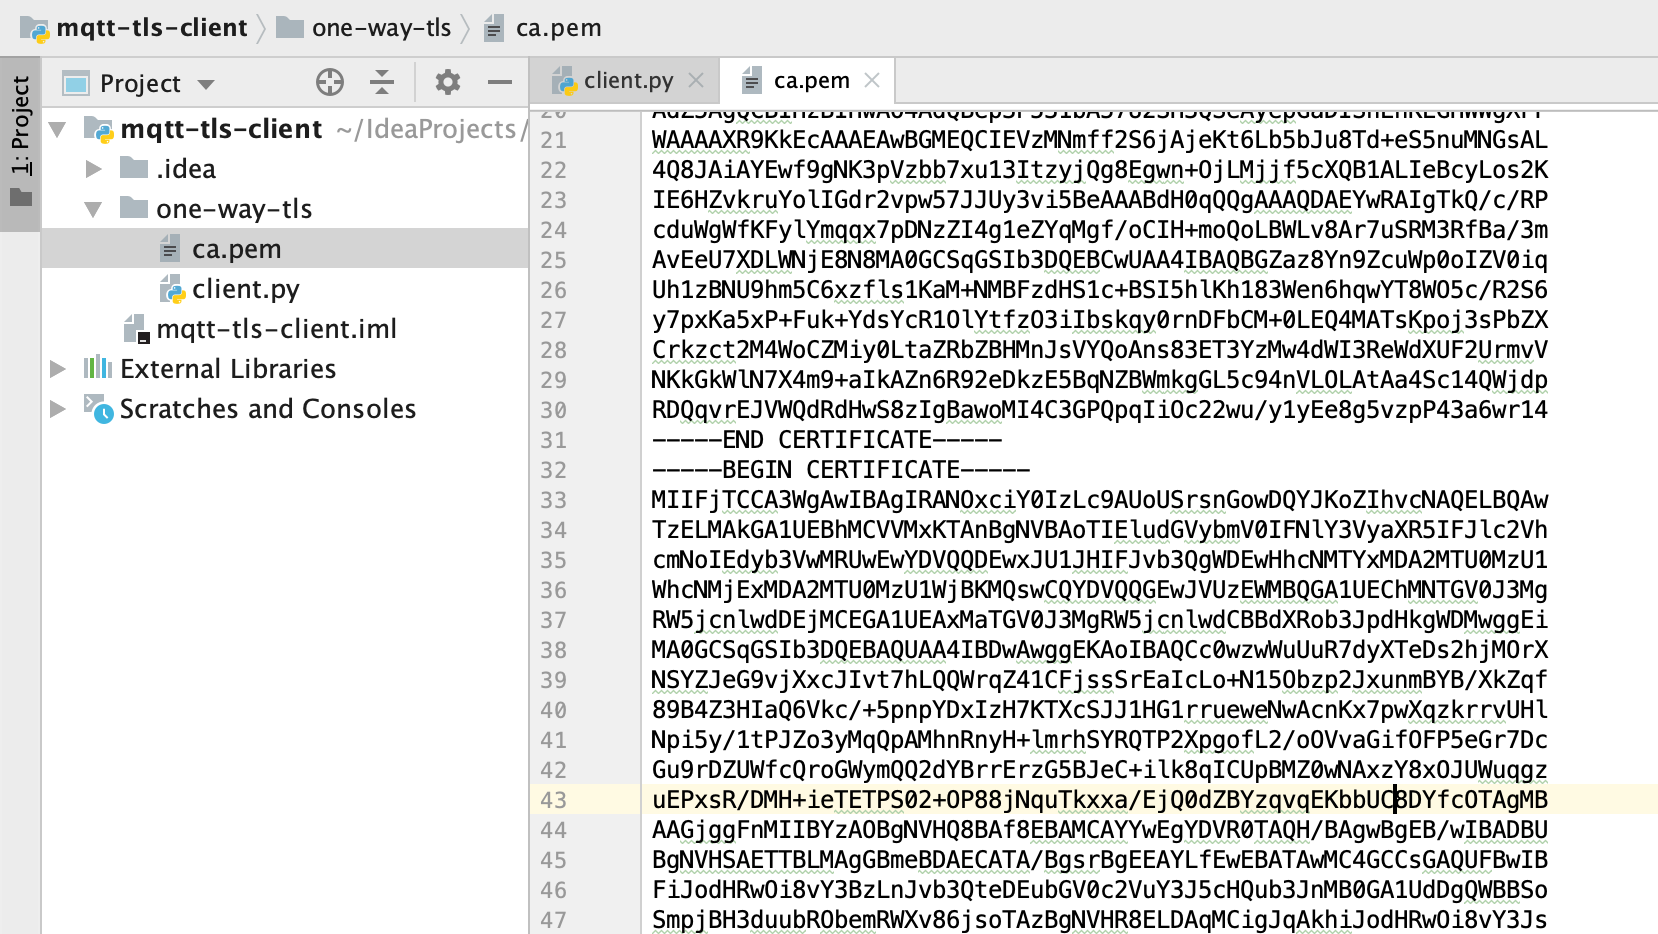
Create a file named ca.pem in your file system and paste the copied root certificate into the file.
To run the below MQTT client on your PC, you will need Python 3 installed.
To speed things up a little, you may also just open it on Repl.it, and paste the copied certificate there, into the empty file ca.pem.
The below client was taken from the “Collecting data from a device” tutorial and upgraded to communicate over MQTT over SSL/TLS.
Create the client.py file with the below content and place it in the same folder as ca.pem.
# Simple MQTT-based one-way SSL/TLS client for the Kaa IoT platform.
# See https://docs.kaaiot.io/KAA/docs/current/Tutorials/getting-started/authenticating-client-with-tls-certificate/.

import json
import random
import signal
import string
import time

import paho.mqtt.client as mqtt

KPC_HOST = "mqtt.cloud.kaaiot.com"  # Kaa Cloud MQTT host
KPC_PORT = 8883  # Kaa Cloud MQTT over SSL/TLS port

ENDPOINT_TOKEN = ""  # Paste your endpoint token
APPLICATION_VERSION = ""  # Paste your application version


class DataCollectionClient:

    def __init__(self, client):
        self.client = client
        self.data_collection_topic = f'kp1/{APPLICATION_VERSION}/dcx/{ENDPOINT_TOKEN}/json'

    def connect_to_server(self):
        print(
            f'Connecting to Kaa server at {KPC_HOST}:{KPC_PORT} using application version {APPLICATION_VERSION} and endpoint token {ENDPOINT_TOKEN}')
        self.client.connect(KPC_HOST, KPC_PORT, 60)
        print('Successfully connected')

    def disconnect_from_server(self):
        print(f'Disconnecting from Kaa server at {KPC_HOST}:{KPC_PORT}...')
        self.client.loop_stop()
        self.client.disconnect()
        print('Successfully disconnected')

    def compose_data_sample(self):
        return json.dumps([{
            'timestamp': int(round(time.time() * 1000)),
            'temperature': random.randint(15, 25),
            'humidity': random.randint(35, 60),
        }])


def on_message(client, userdata, message):
    print(
        f'<-- Received message on topic "{message.topic}":\n{str(message.payload.decode("utf-8"))}')


def main():
    # Initiate server connection
    client = mqtt.Client(
        client_id=''.join(random.choice(string.ascii_uppercase + string.digits) for _ in range(6)))

    data_collection_client = DataCollectionClient(client)
    data_collection_client.connect_to_server()
    client.on_message = on_message
    client.tls_set(ca_certs="ca.pem")

    # Start the loop
    client.loop_start()

    # Send data samples in loop
    listener = SignalListener()
    while listener.keepRunning:

        payload = data_collection_client.compose_data_sample()

        result = data_collection_client.client.publish(
            topic=data_collection_client.data_collection_topic, payload=payload)
        if result.rc != 0:
            print('Server connection lost, attempting to reconnect')
            data_collection_client.connect_to_server()
        else:
            print(
                f'--> Sent message on topic "{data_collection_client.data_collection_topic}":\n{payload}')

        time.sleep(3)

    data_collection_client.disconnect_from_server()


class SignalListener:
    keepRunning = True

    def __init__(self):
        signal.signal(signal.SIGINT, self.stop)
        signal.signal(signal.SIGTERM, self.stop)

    def stop(self, signum, frame):
        print('Shutting down...')
        self.keepRunning = False


if __name__ == '__main__':
    main()
Now you should have a folder with two files - one with the Kaa server root certificate (ca.pem) and the other with the Python MQTT client (client.py).
Initialize the ENDPOINT_TOKEN variable with the endpoint token, APPLICATION_VERSION with the endpoint application version, and run the client.py Python script.
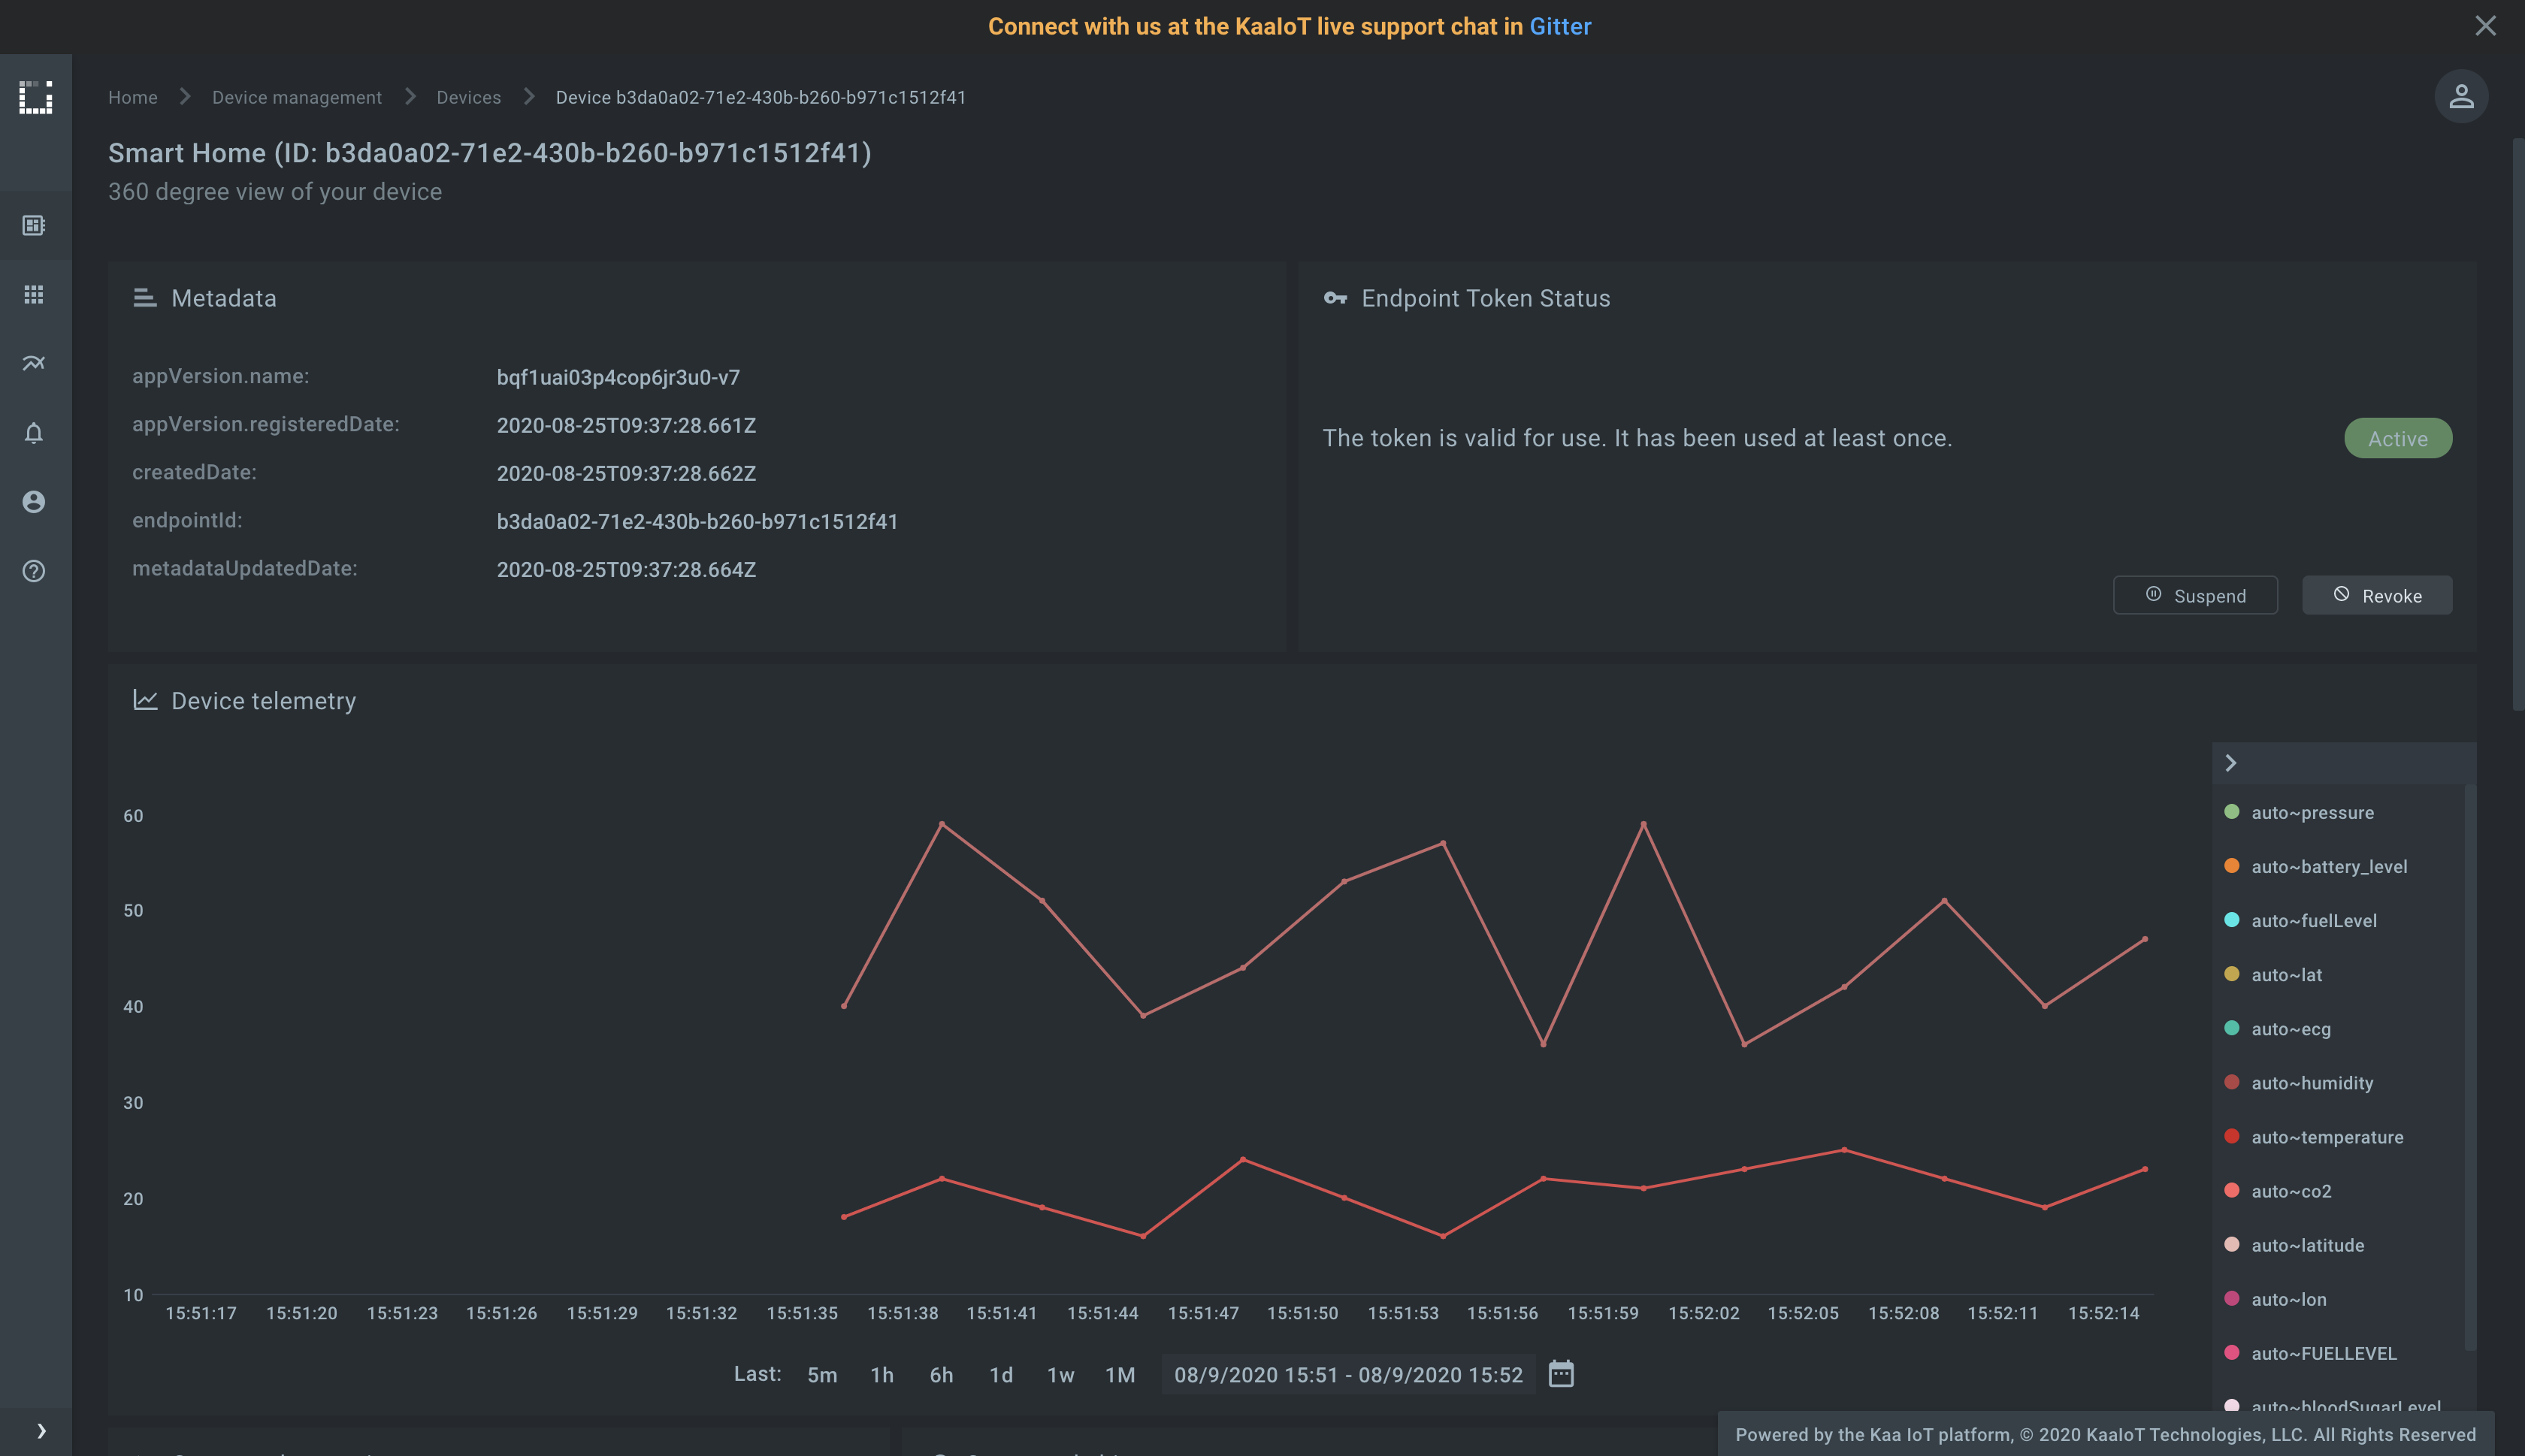
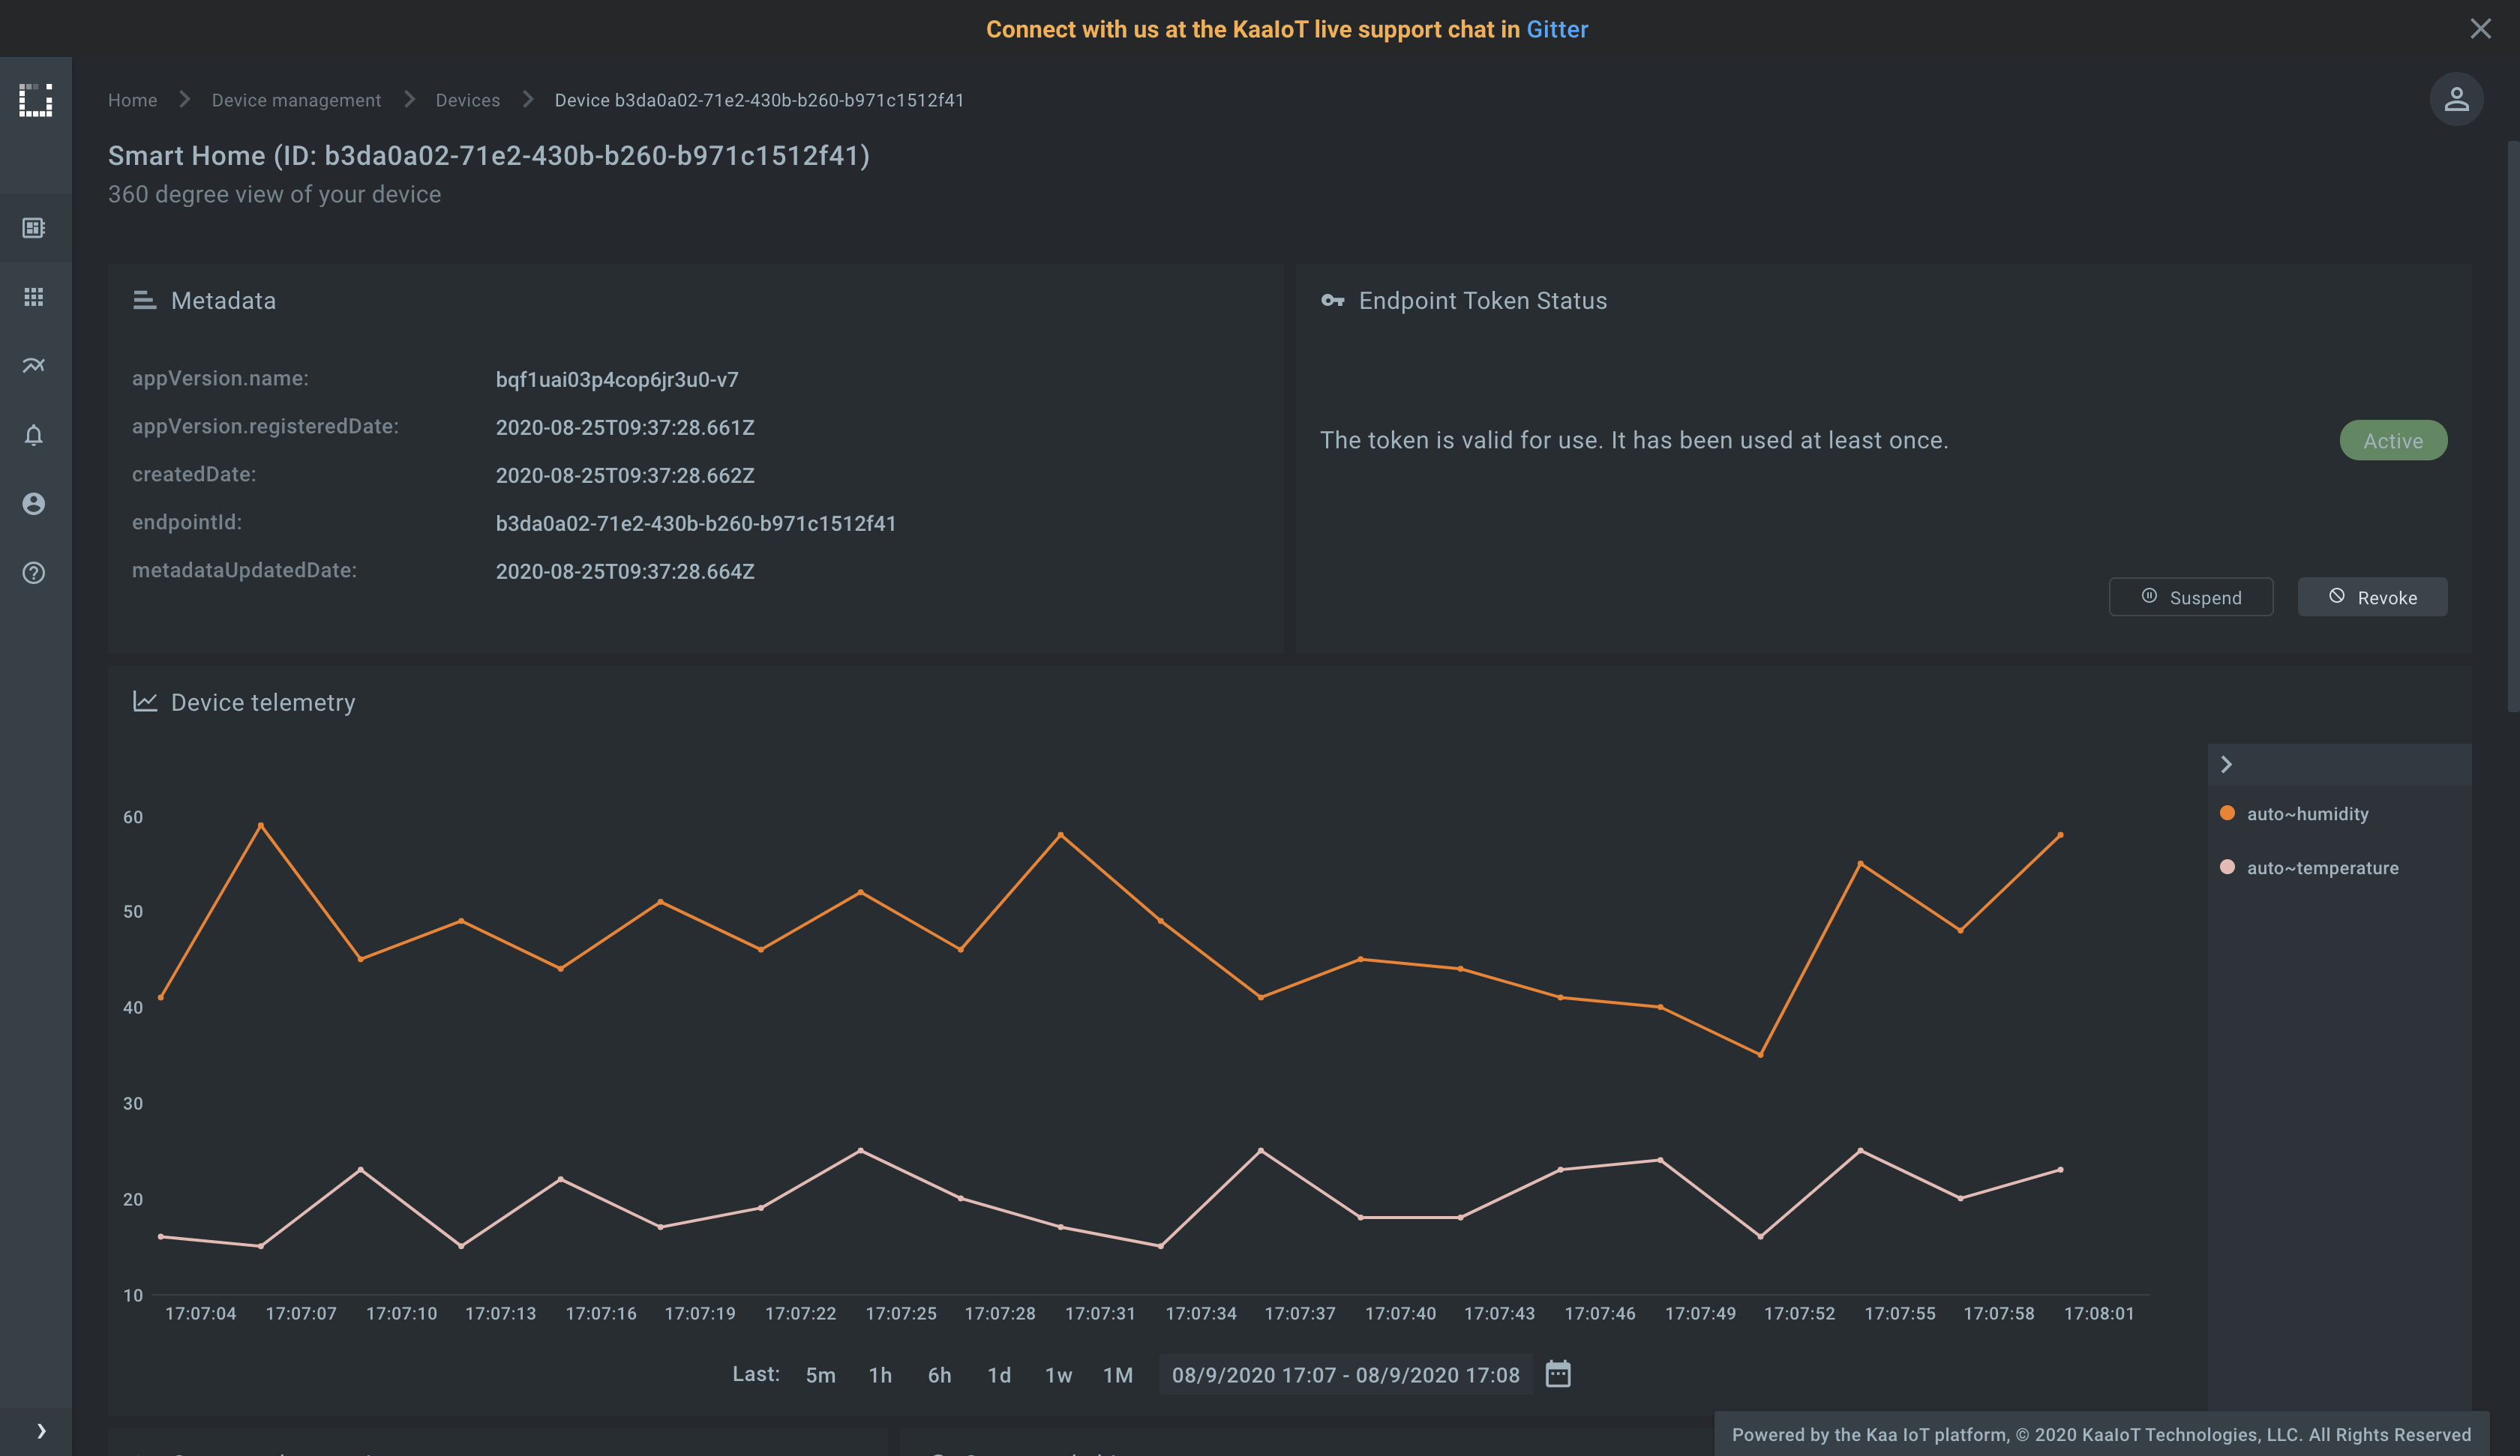
Verify that the telemetry chart on the device dashboard contains data.
Congrats, you have set up one-way SSL/TLS communication! It’s time to upgrade your skills and master two-way SSL/TLS communication, which is even more secure.
Two-way (mutual) SSL/TLS communication
In the case with two-way SSL, both the client and the server authenticate each other to ensure that both parties involved in the communication can be trusted. Both parties share their public certificates with each other and then perform mutual verification/validation. With the mutual SSL/TLS communication feature enabled, the Kaa server starts data exchange only with those clients that presented a Kaa-trusted certificate.
Playbook
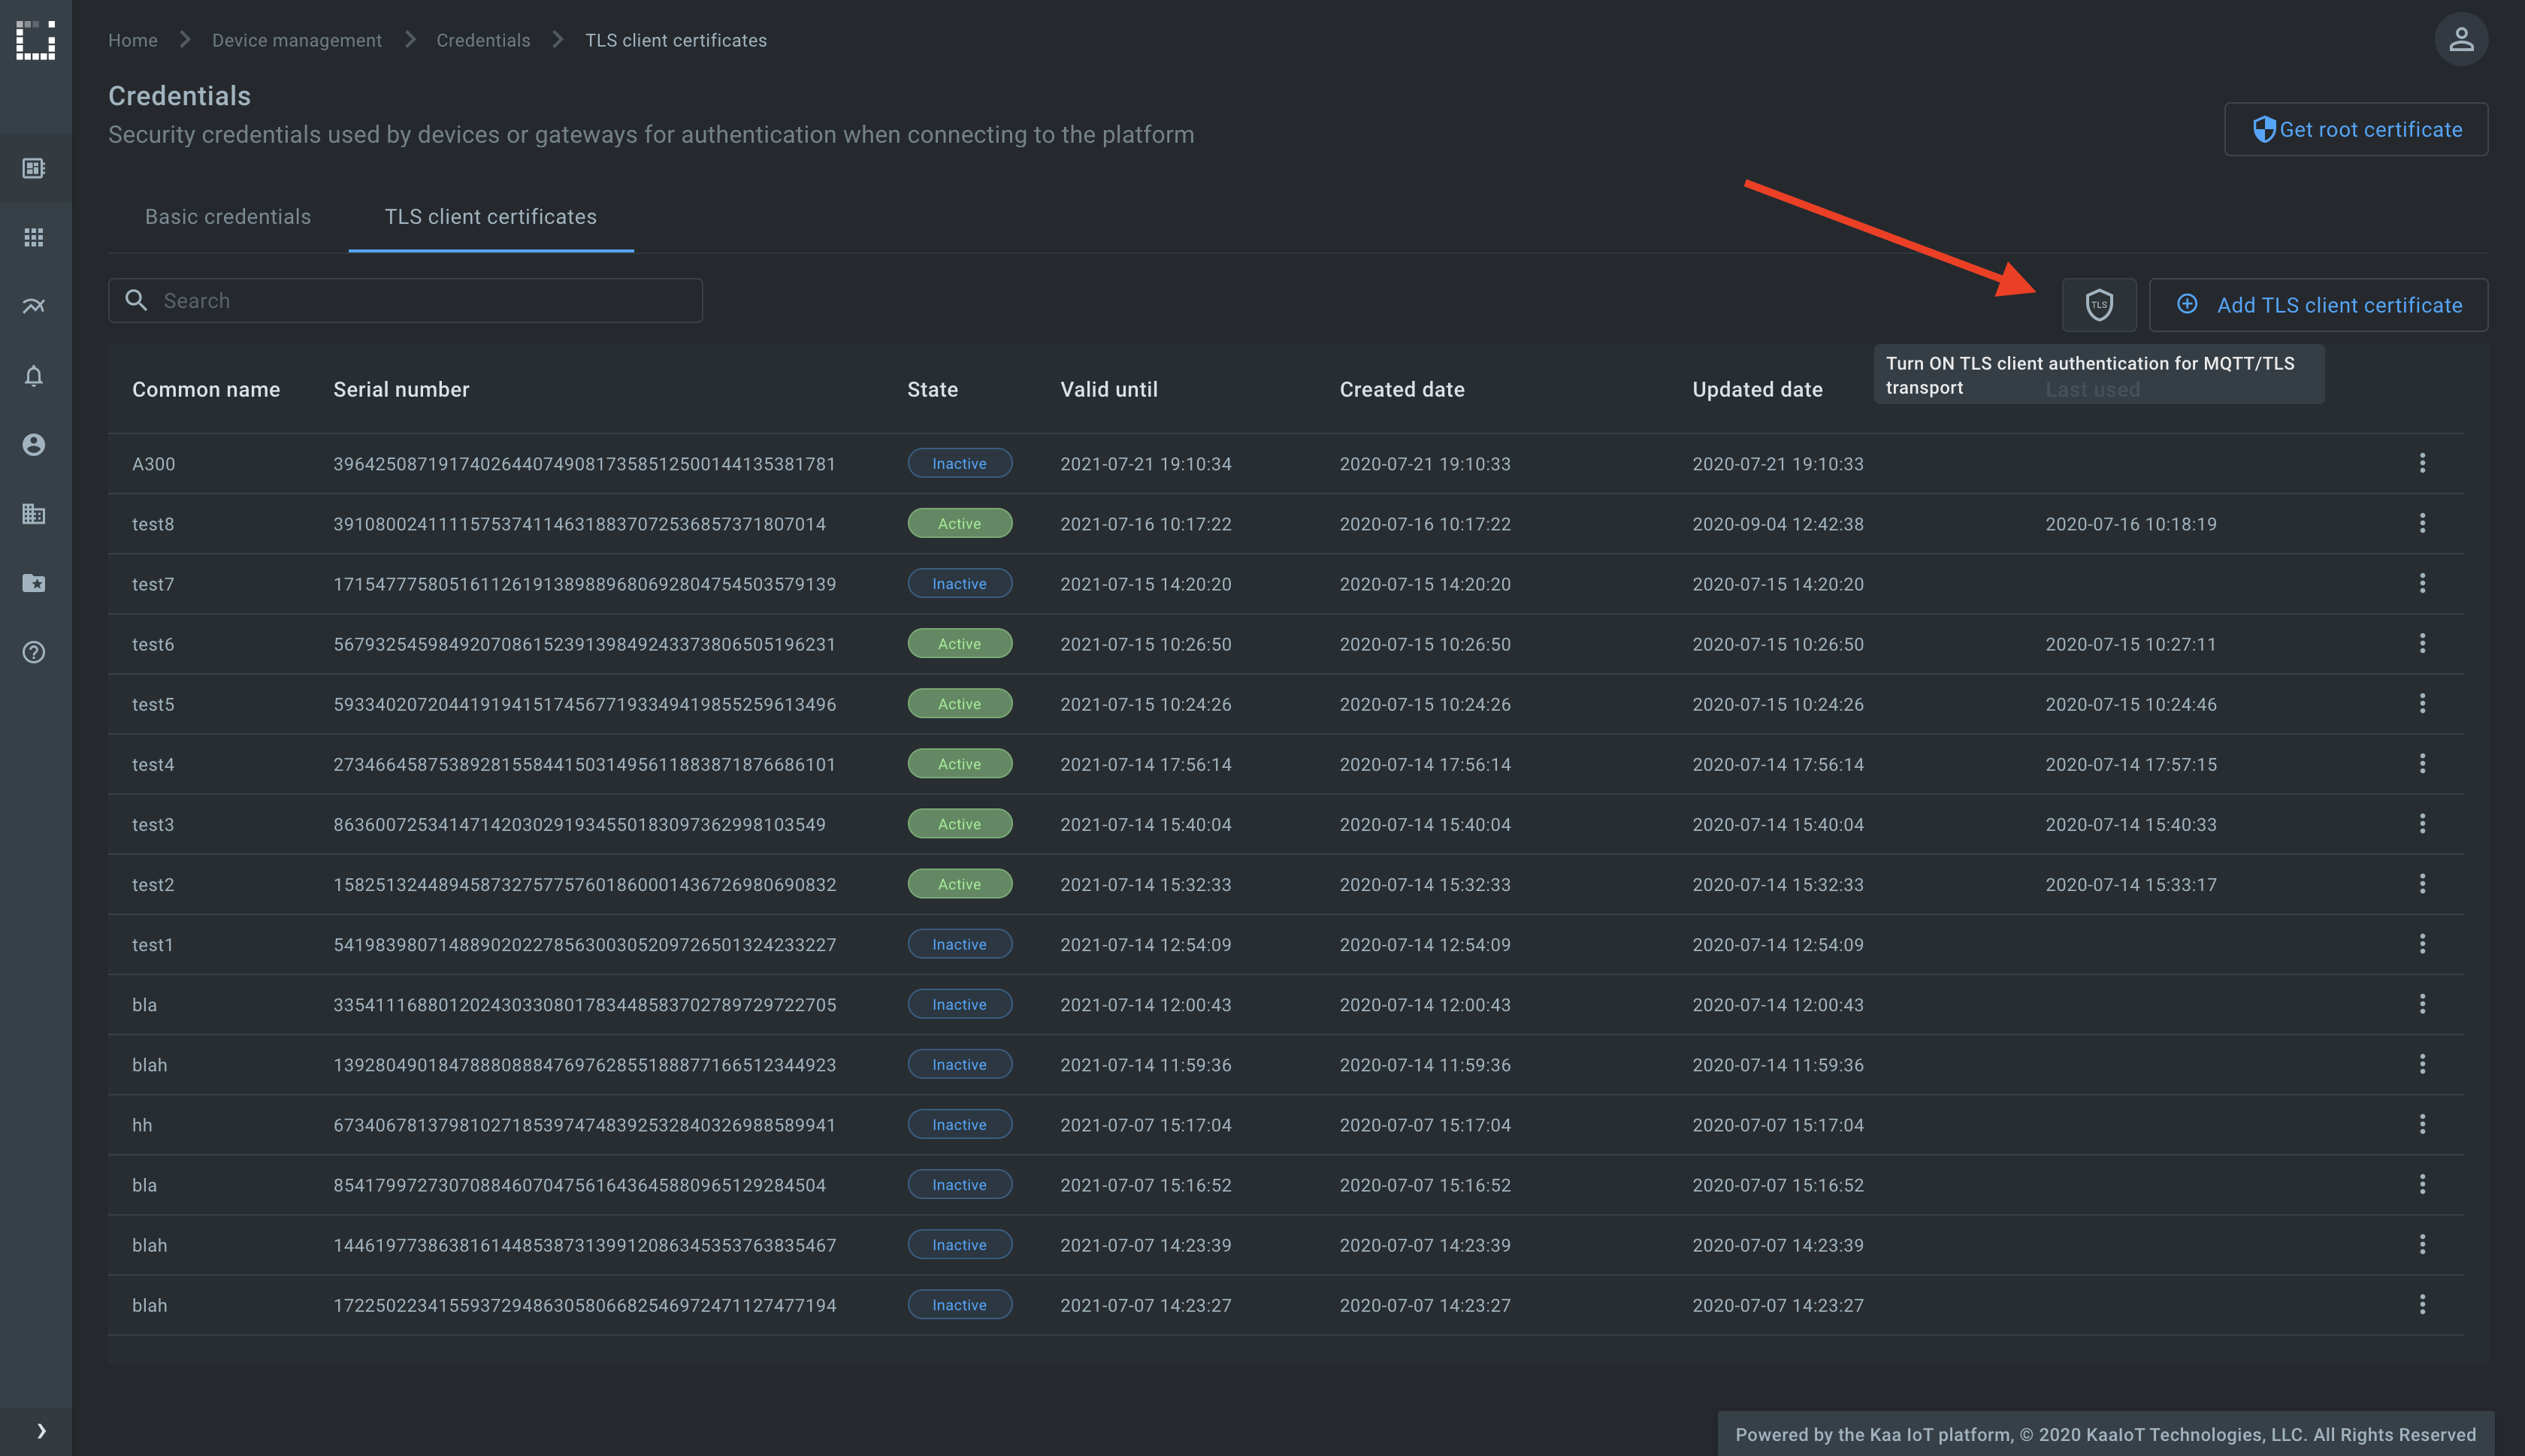
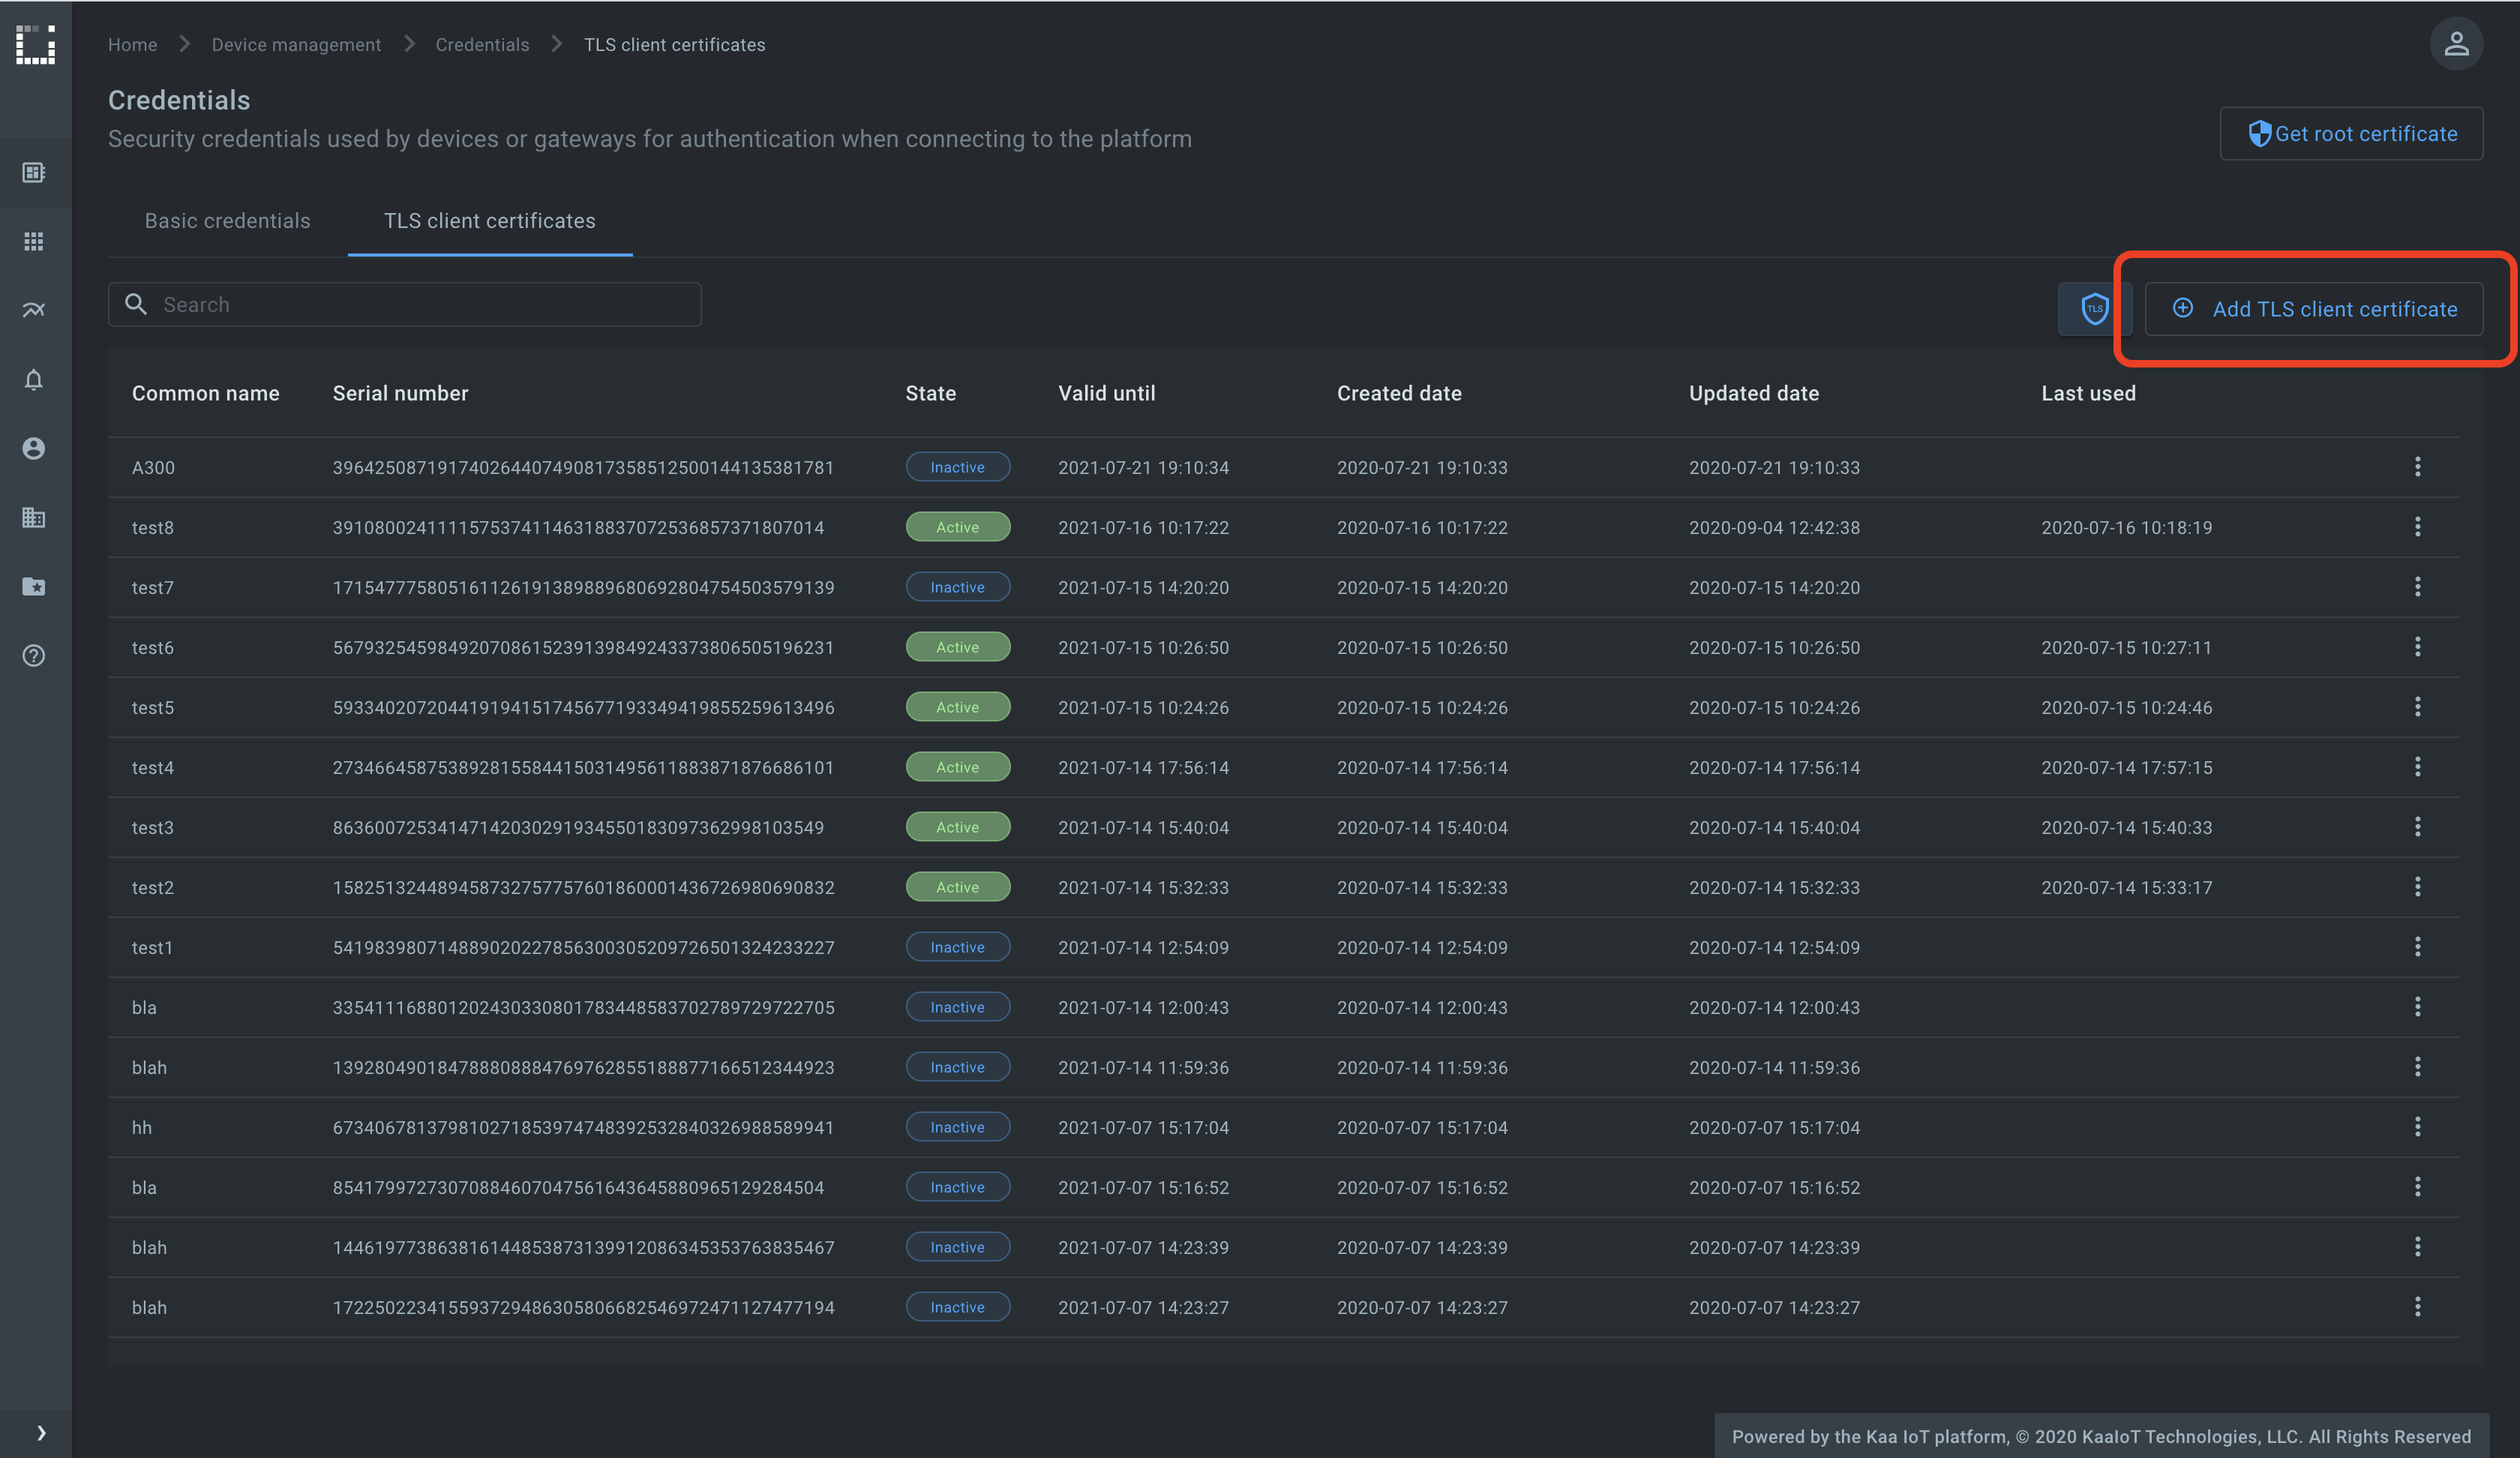
To enable the mutual SSL/TLS communication feature, go to the Device management, then Credentials, then the TLS client certificates tab, click shield icon, and turn on the TLS client certificate authentication for the MQTT/TLS transport.
Now that the feature is enabled, Kaa immediately drops connections with those clients that start data exchange without presenting a trusted X.509 certificate.
To generate a Kaa-trusted X.509 certificate/key pair, click Add TLS client certificate, enter optional Common Name (CN) and TTL, and click Create.
The pop-up with a certificate chain and a private key must appear.
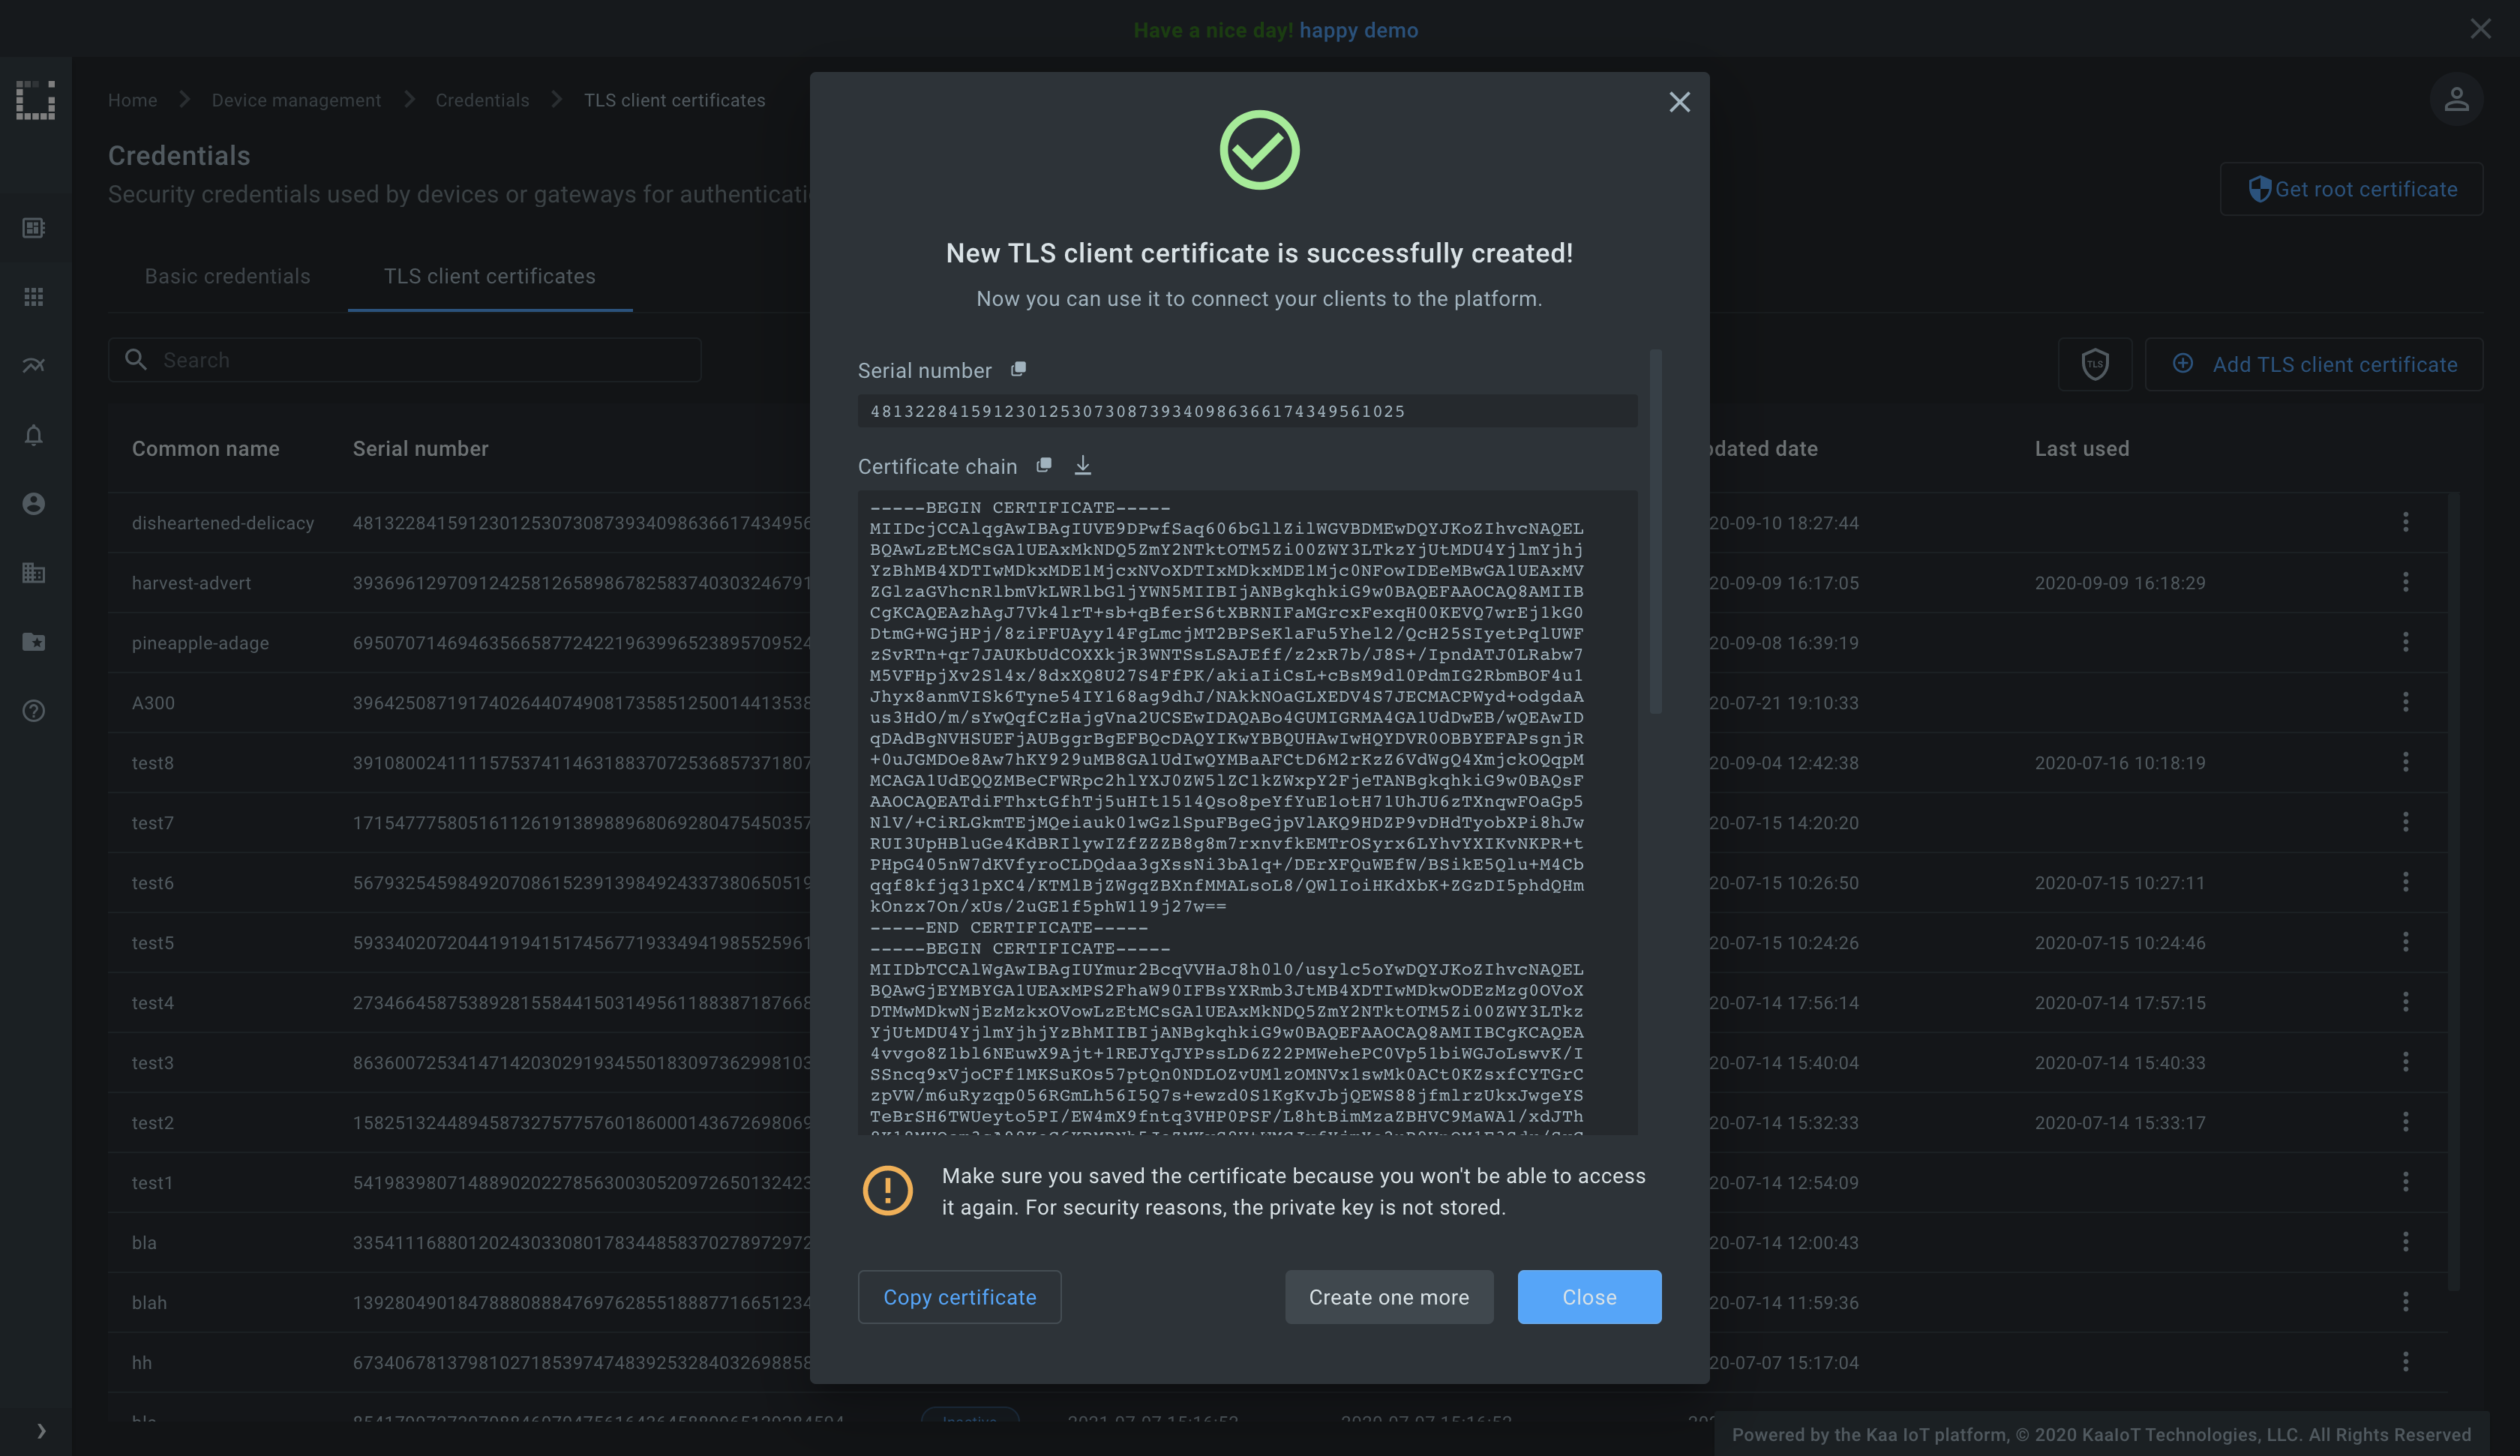
Create the file named client.crt in your file system and add there the content of the Certificate chain field from the pop-up.
Then, create the file named client.key and add there the content of the Private key field from the pop-up.
We assume that you have already created the ca.pem with the Kaa server root certificate as described above in the one-way SSL/TLS communication section, so create it if you haven’t done it yet.
To run the below MQTT client on your PC, you will need Python 3 installed.
To speed things up a little, you may also just open it on Repl.it, and paste the copied server root certificate, client certificate, and private key there into empty files named ca.pem, client.crt and client.key, respectively.
Create the client.py file with the below content and place it in the same folder as ca.pem, client.crt and client.key.
# Simple MQTT-based one-way SSL/TLS client for the Kaa IoT platform.
# See https://docs.kaaiot.io/KAA/docs/current/Tutorials/getting-started/tls-certificate-client-communication/.

import json
import random
import signal
import string
import time

import paho.mqtt.client as mqtt

KPC_HOST = "mqtt.cloud.kaaiot.com"  # Kaa Cloud plain MQTT host
KPC_PORT = 8883  # Kaa Cloud plain MQTT port

ENDPOINT_TOKEN = ""  # Paste your endpoint token
APPLICATION_VERSION = ""  # Paste your application version


class DataCollectionClient:

    def __init__(self, client):
        self.client = client
        self.data_collection_topic = f'kp1/{APPLICATION_VERSION}/dcx/{ENDPOINT_TOKEN}/json'

    def connect_to_server(self):
        print(
            f'Connecting to Kaa server at {KPC_HOST}:{KPC_PORT} using application version {APPLICATION_VERSION} and endpoint token {ENDPOINT_TOKEN}')
        self.client.connect(KPC_HOST, KPC_PORT, 60)
        print('Successfully connected')

    def disconnect_from_server(self):
        print(f'Disconnecting from Kaa server at {KPC_HOST}:{KPC_PORT}...')
        self.client.loop_stop()
        self.client.disconnect()
        print('Successfully disconnected')

    def compose_data_sample(self):
        return json.dumps([{
            'timestamp': int(round(time.time() * 1000)),
            'temperature': random.randint(15, 25),
            'humidity': random.randint(35, 60),
        }])


def on_message(client, userdata, message):
    print(
        f'<-- Received message on topic "{message.topic}":\n{str(message.payload.decode("utf-8"))}')


def main():
    # Initiate server connection
    client = mqtt.Client(
        client_id=''.join(random.choice(string.ascii_uppercase + string.digits) for _ in range(6)))

    data_collection_client = DataCollectionClient(client)
    data_collection_client.connect_to_server()
    client.on_message = on_message
    client.tls_set(ca_certs="ca.pem", certfile="client.crt", keyfile="client.key")

    # Start the loop
    client.loop_start()

    # Send data samples in loop
    listener = SignalListener()
    while listener.keepRunning:

        payload = data_collection_client.compose_data_sample()

        result = data_collection_client.client.publish(
            topic=data_collection_client.data_collection_topic, payload=payload)
        if result.rc != 0:
            print('Server connection lost, attempting to reconnect')
            data_collection_client.connect_to_server()
        else:
            print(
                f'--> Sent message on topic "{data_collection_client.data_collection_topic}":\n{payload}')

        time.sleep(3)

    data_collection_client.disconnect_from_server()


class SignalListener:
    keepRunning = True

    def __init__(self):
        signal.signal(signal.SIGINT, self.stop)
        signal.signal(signal.SIGTERM, self.stop)

    def stop(self, signum, frame):
        print('Shutting down...')
        self.keepRunning = False


if __name__ == '__main__':
    main()
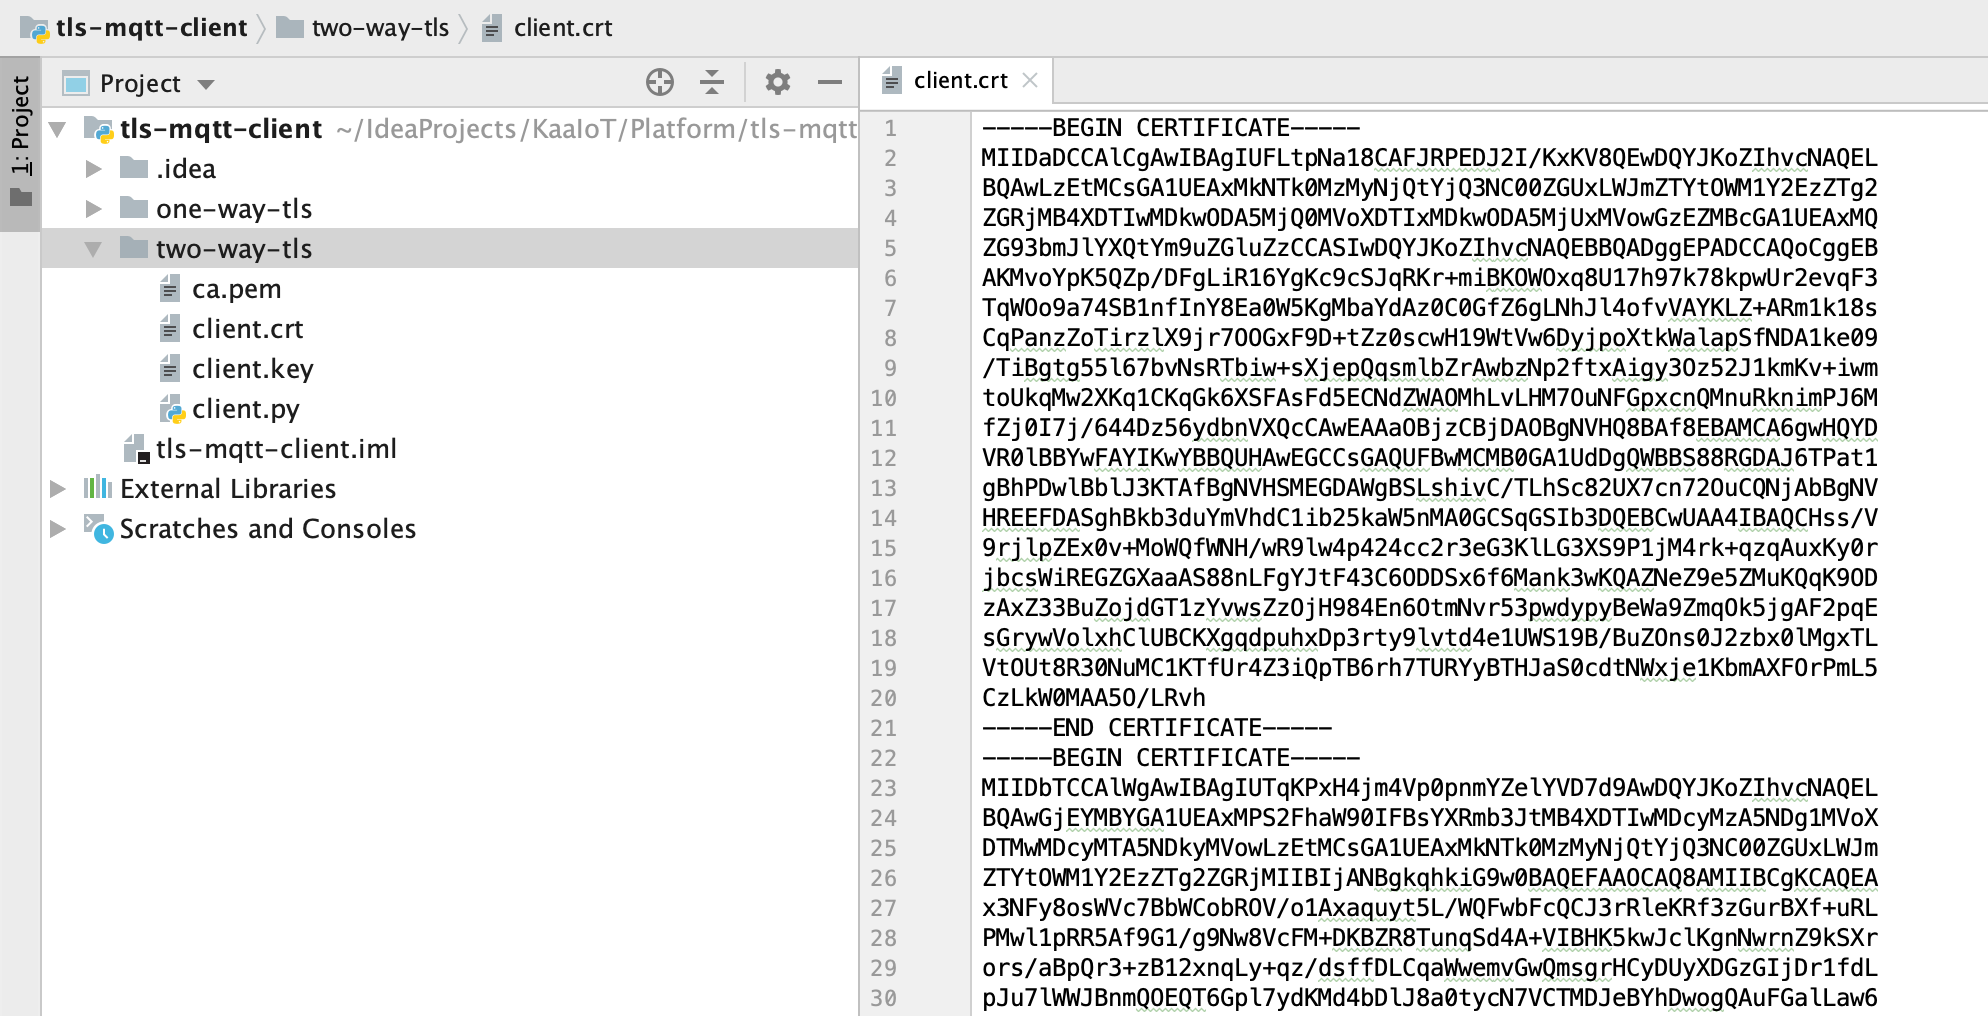
Now you should have a folder with four files:
- Kaa server root certificate -
ca.pem - client certificate -
client.crt - client private key -
client.key - Python MQTT client -
client.py
Initialize the ENDPOINT_TOKEN variable with the endpoint token, APPLICATION_VERSION with the endpoint application version, and run the client.py Python script.
Verify that the telemetry chart on the device dashboard contains data.
TLS client certificate state management
Client X.509 (TLS) certificates can have one of the below states:
- Inactive is the initial state for a newly provisioned certificate that has not yet been used to authenticate a client.
- Active is the state to which the certificate automatically moves after it was first used for the client authentication. A certificate can be suspended or revoked from the active state.
- Suspended state is for a temporarily disabled certificate. Kaa rejects authentication requests with a suspended certificate. A suspended certificate can be re-activated.
- Revoked state is the terminal state for a certificate that is no longer valid.
Go to the Device management, then Credentials, find the recently generated certificate that is used by the running MQTT client, and suspend it.
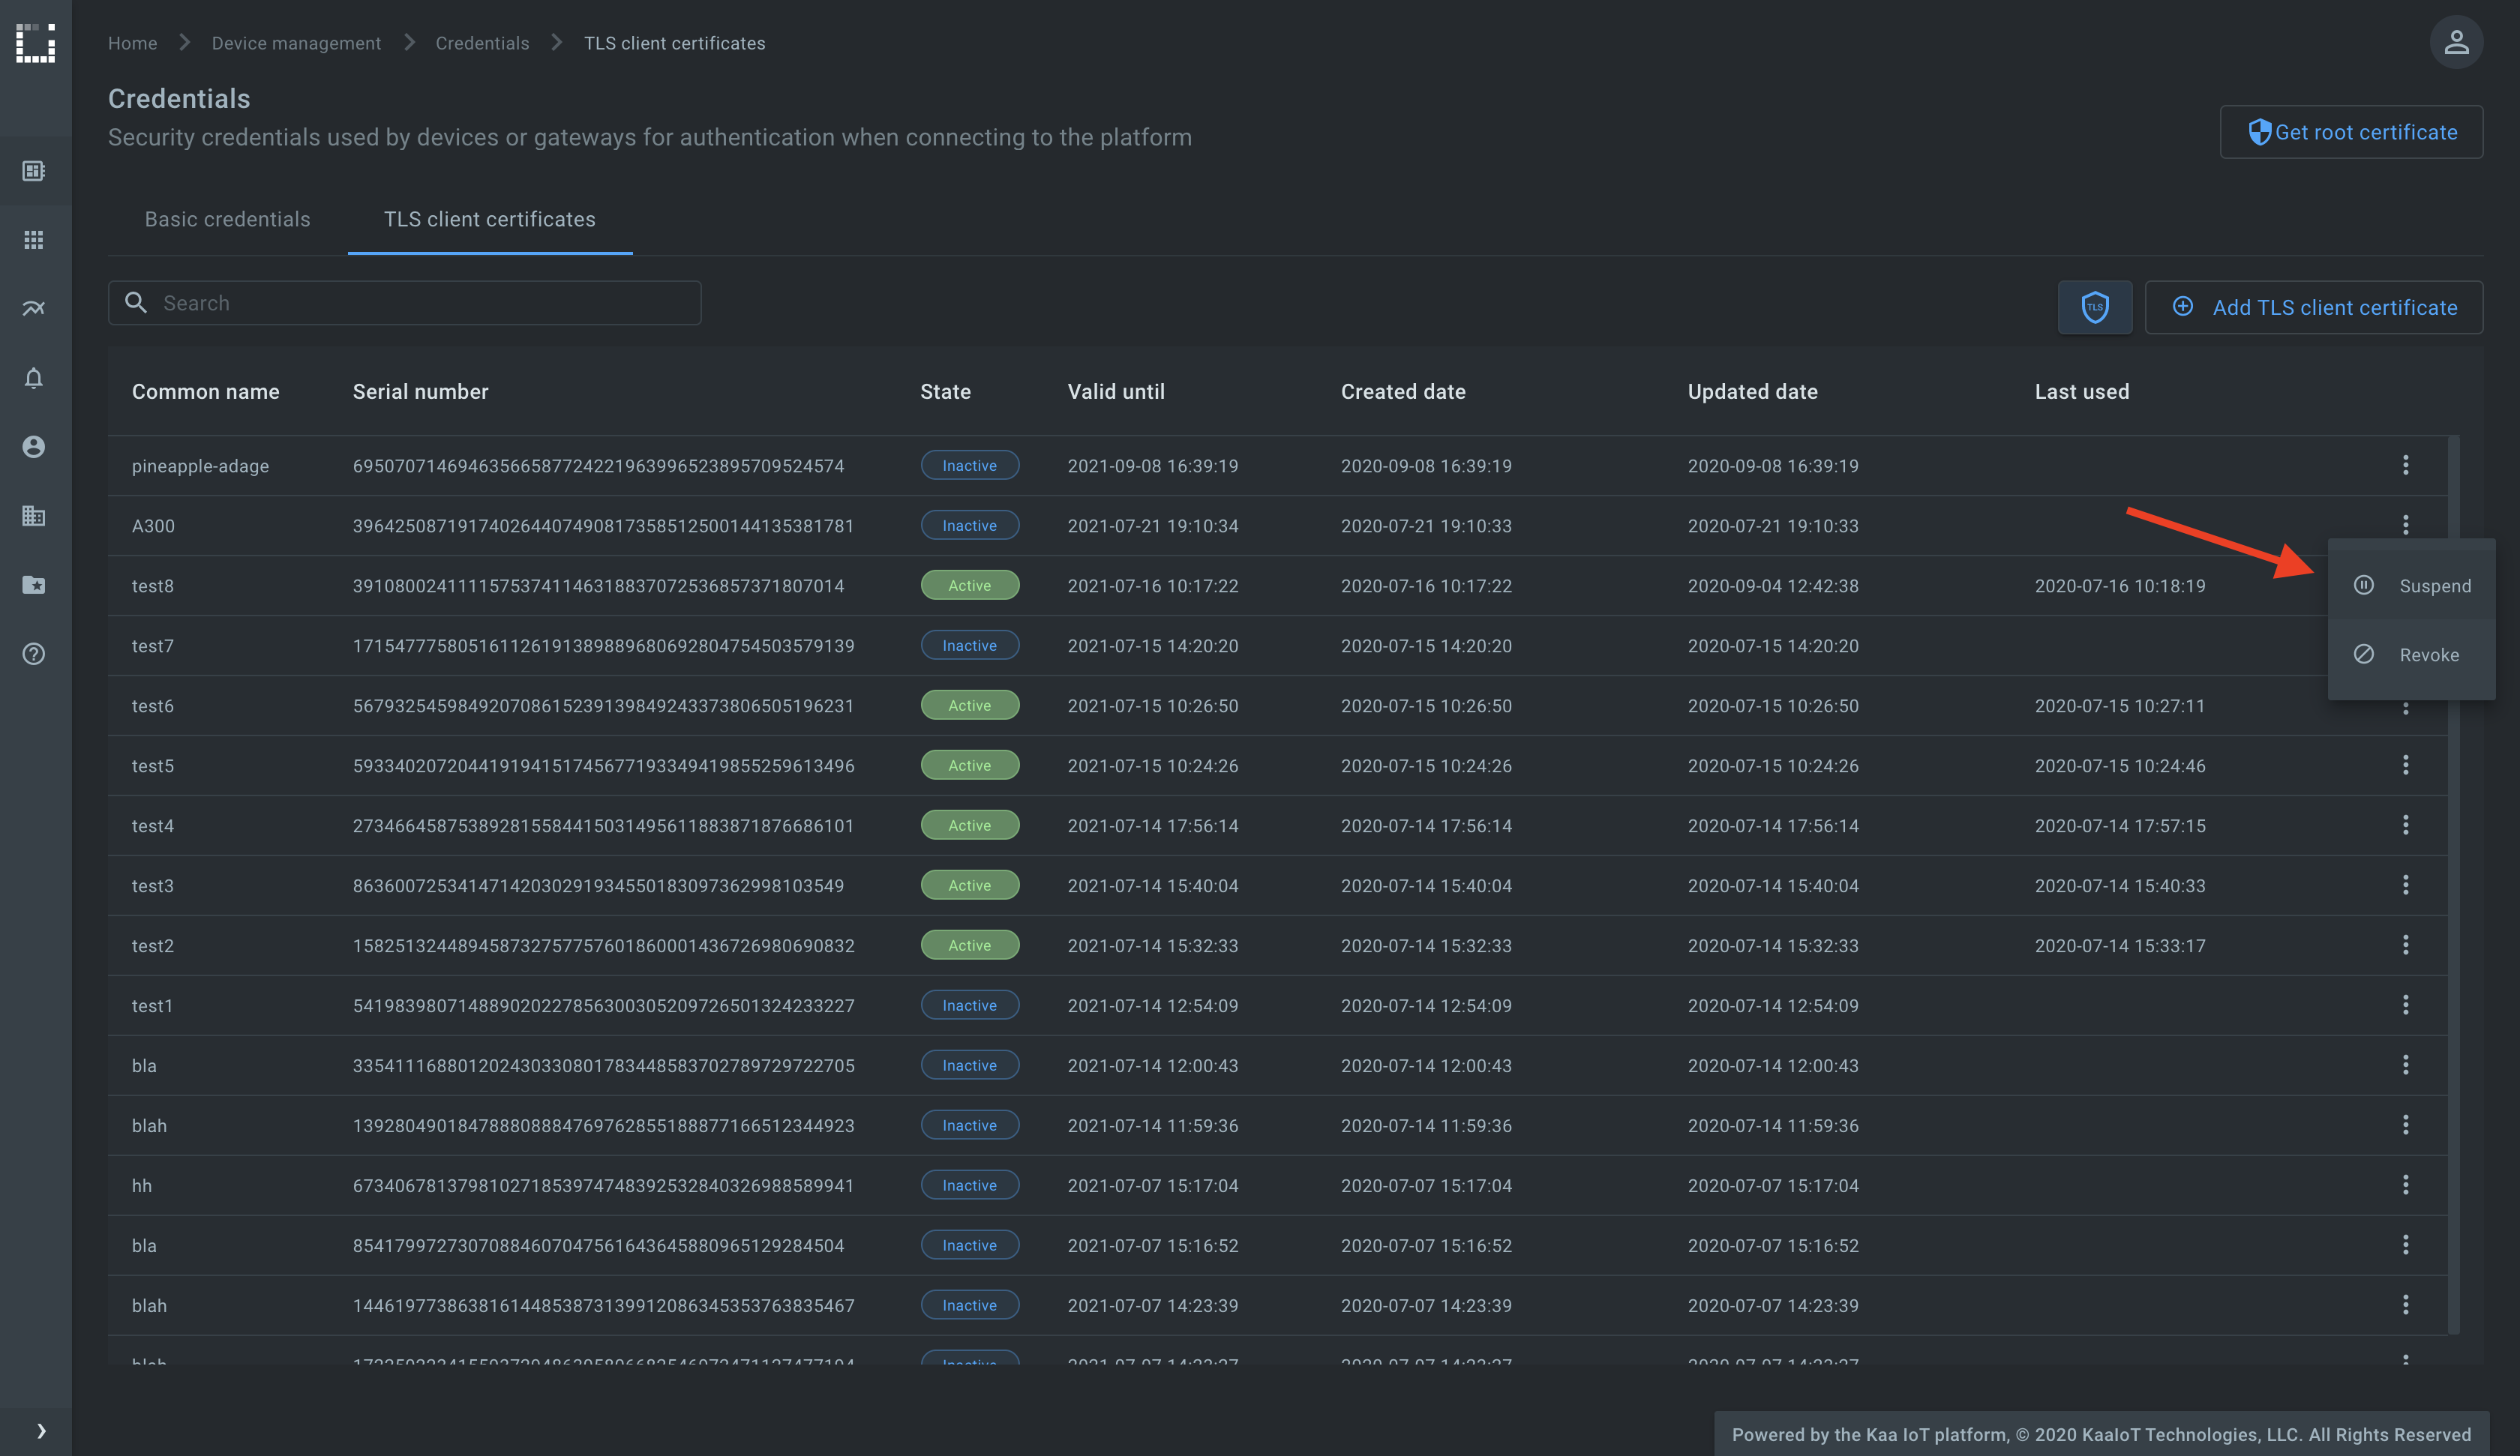
Check the running MQTT client, it must be disconnected. Note that the platform automatically disconnects all clients that were using a certificate in the moment of its suspension or revocation.
Resources
All the tutorial resources are located on GitHub.
Feedback
This tutorial is based on Kaa 1.2 released on July 6-th, 2020. If you, our reader from the future, spot some major discrepancies with your current version of the Kaa platform, or if anything does not work for you, please give us a shout and we will help!
And if the tutorial served you well, we’d still love to hear your feedback, so join the community!