Open Distro alerting
Based on the Kaa v1.2.
Time to complete: 19 min.
Overview
Welcome to the fourth tutorial in the Kaa getting started guide! We assume that you have successfully connected your first device to Kaa and collected data from a device, so make sure to review those tutorials before proceeding here.
From this tutorial, you will learn how to configure alerts to be triggered when a certain telemetry value from the endpoint exceeds a defined threshold.
In this tutorial, we will configure an alert that sends a Slack notification when the CO2 level in the office is higher than normal.
Open Distro integration
Kaa data collection feature is seamlessly integrated with Open Distro in such way that all telemetry data coming from your endpoints gets automatically ingested into Elasticsearch index attached to your tenant.
So what is Open Distro? Open Distro is open-source distribution of Elasticsearch with advanced security, alerting, SQL support, automated index management, deep performance analysis, and more.
Playbook
Push telemetry data
Firstly, we should push telemetry data into Kaa to be able to define an Open Distro monitor.
For that, execute the below cURL replacing <app-version-name> and <endpoint-token> with your application version name and the endpoint token respectively.
curl --location --request POST 'https://connect.cloud.kaaiot.com:443/kp1/<app-version-name>/dcx/<endpoint-token>/json' \
--data-raw '{
  "co2": 1050
}'
Create monitor
Now we want to create a monitor in Open Distro that will constantly query Elasticsearch index for telemetry coming from an endpoint. Monitor is a job that runs on a defined schedule and queries Elasticsearch. The results of such querying are then used as an input for one or more triggers, which we will create a bit later. More info on Open Distro monitors is here.
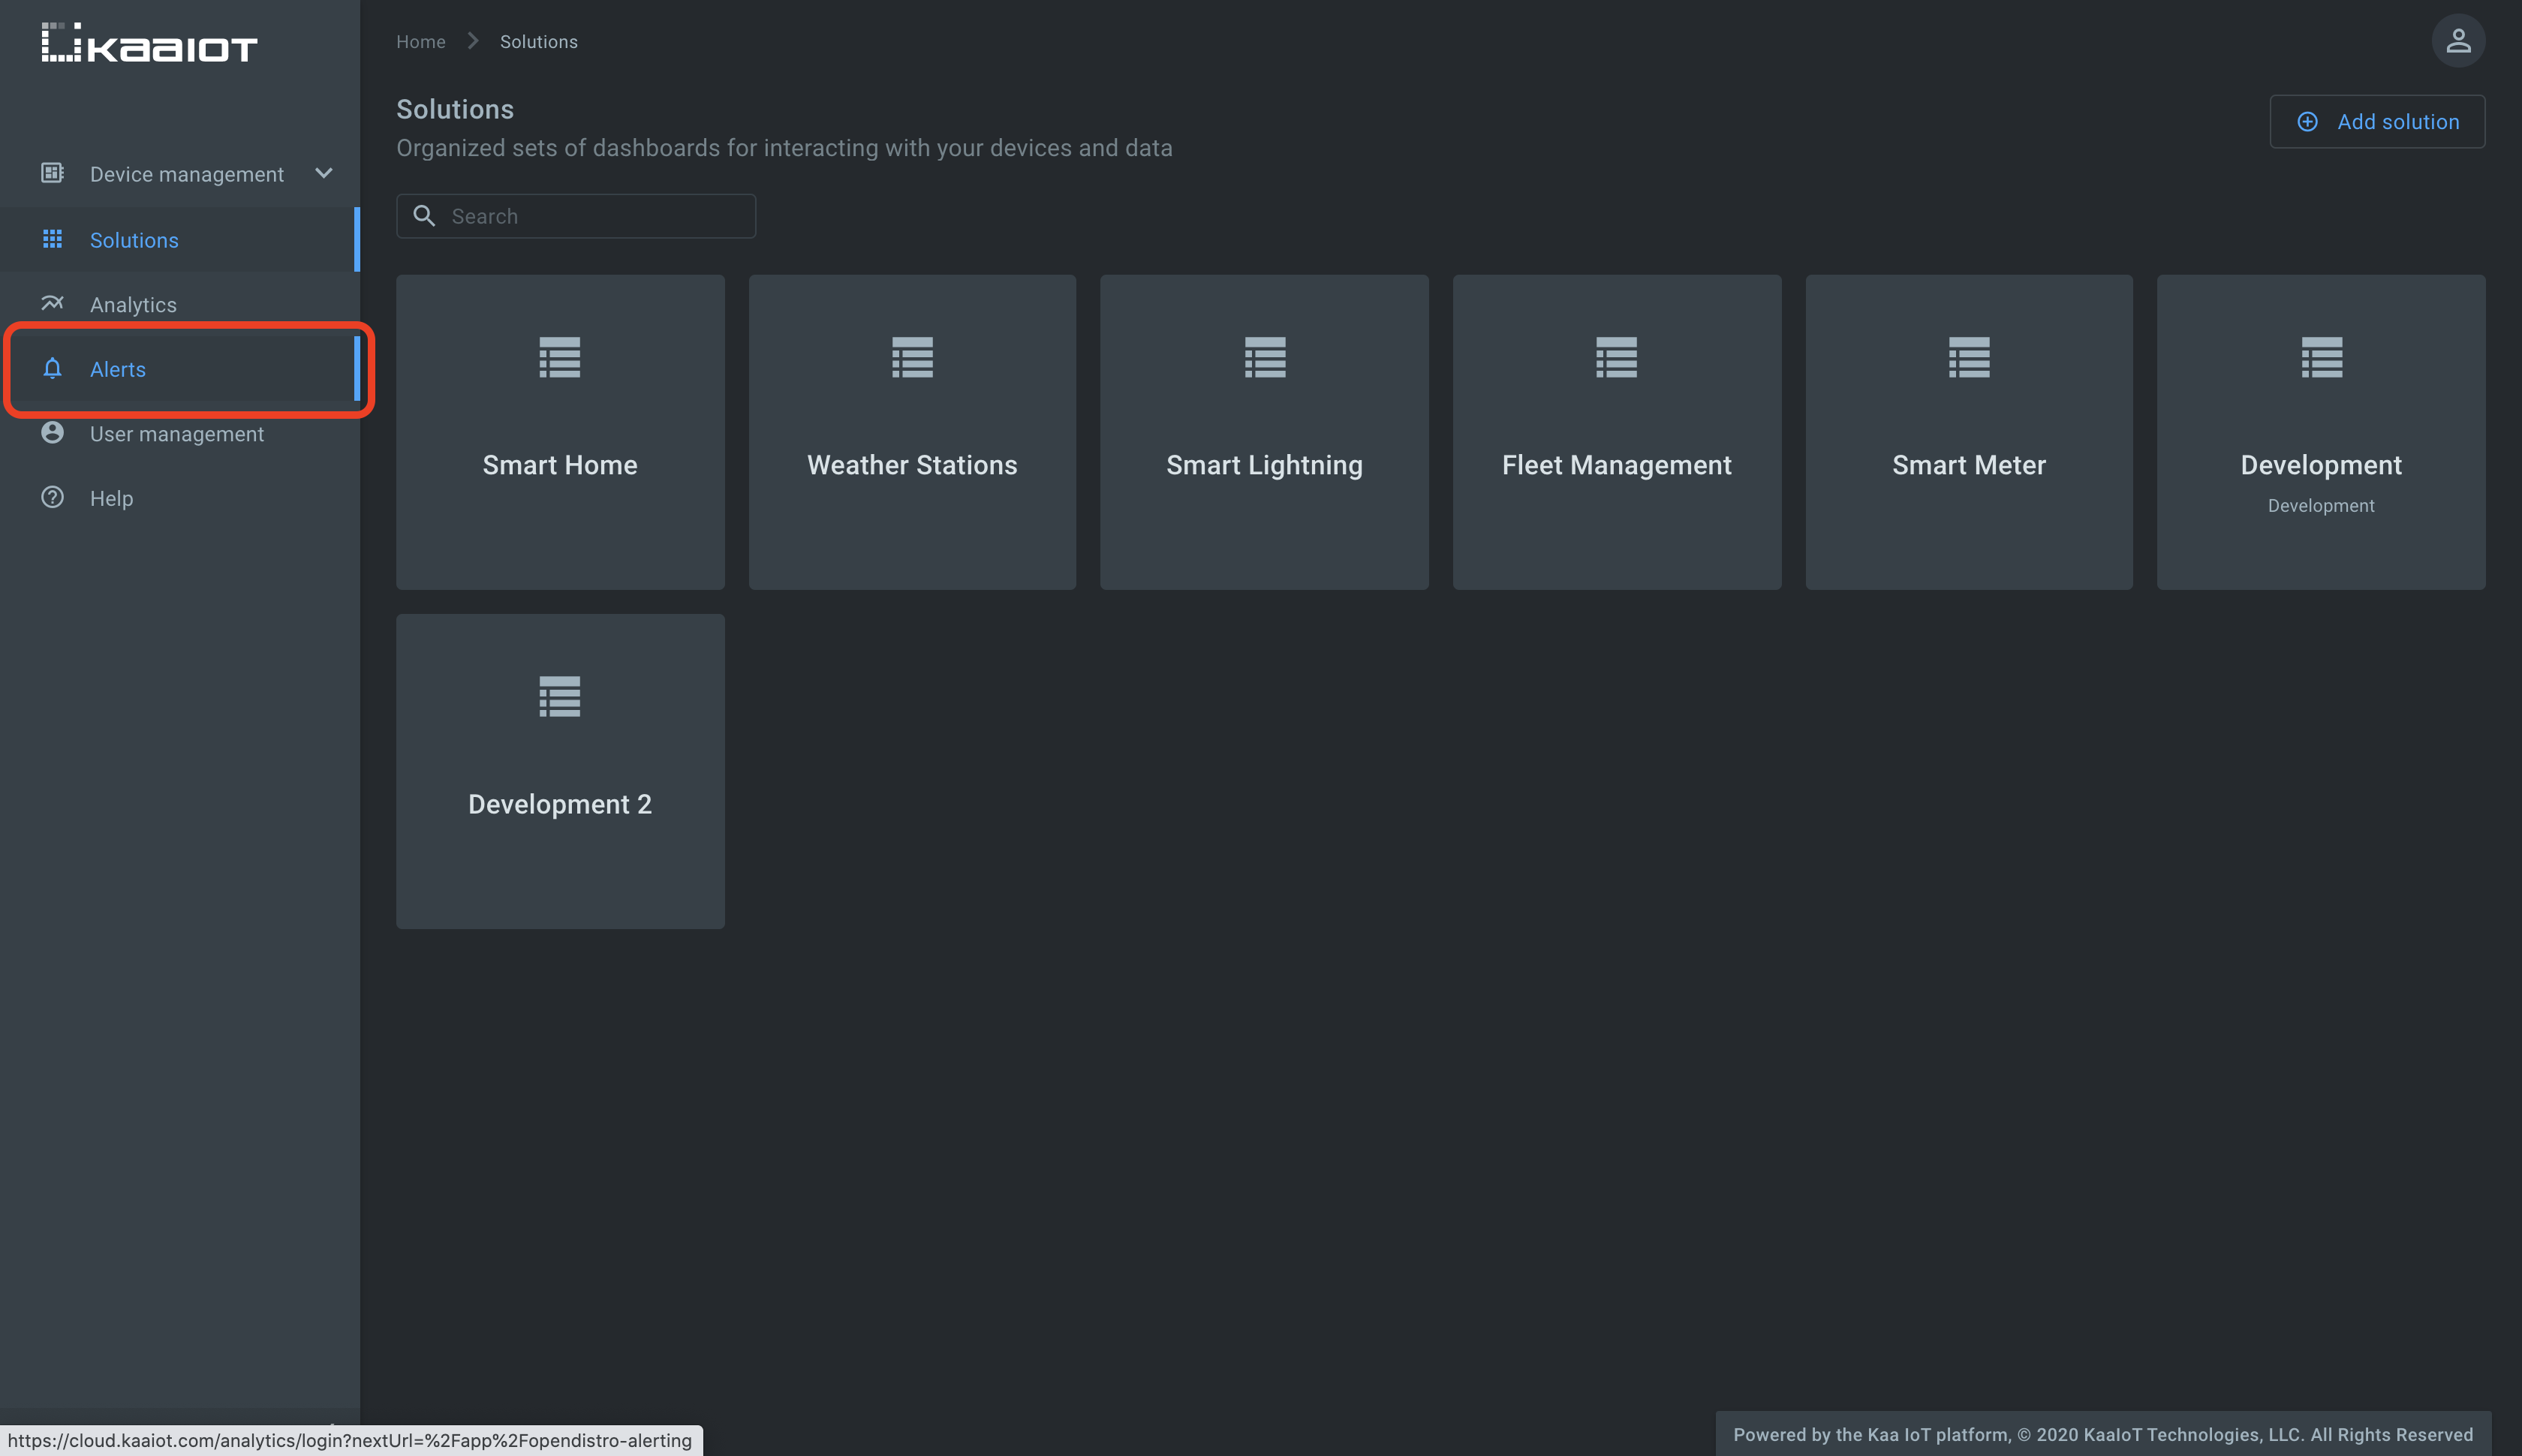
Click on “Alerts” on Kaa UI to be redirected to the alerts management dashboard in Kibana.
Click “Create monitor”.

- Fill out the monitor name (e.g.,
CO2 level monitor). - Select “Define using visual graph” for the “How do you want to define the monitor?” field.
- Fill out index with your tenant ID followed by asterisk
*. You can find your tenant ID in the user account info pop-up on Kaa UI. The field must look like{your-tenant-ID}*. - Select the
@timestamptime field from the dropdown. - Define the below query for the “Create monitor for” field:
WHEN max()
OF dataSample.co2
OVER all documents
FOR THE LAST 1 minute(s)
WHERE dataSample.co2 is greater than 1000
Here we calculate the maximum value across all documents where co2 is greater than 1000.
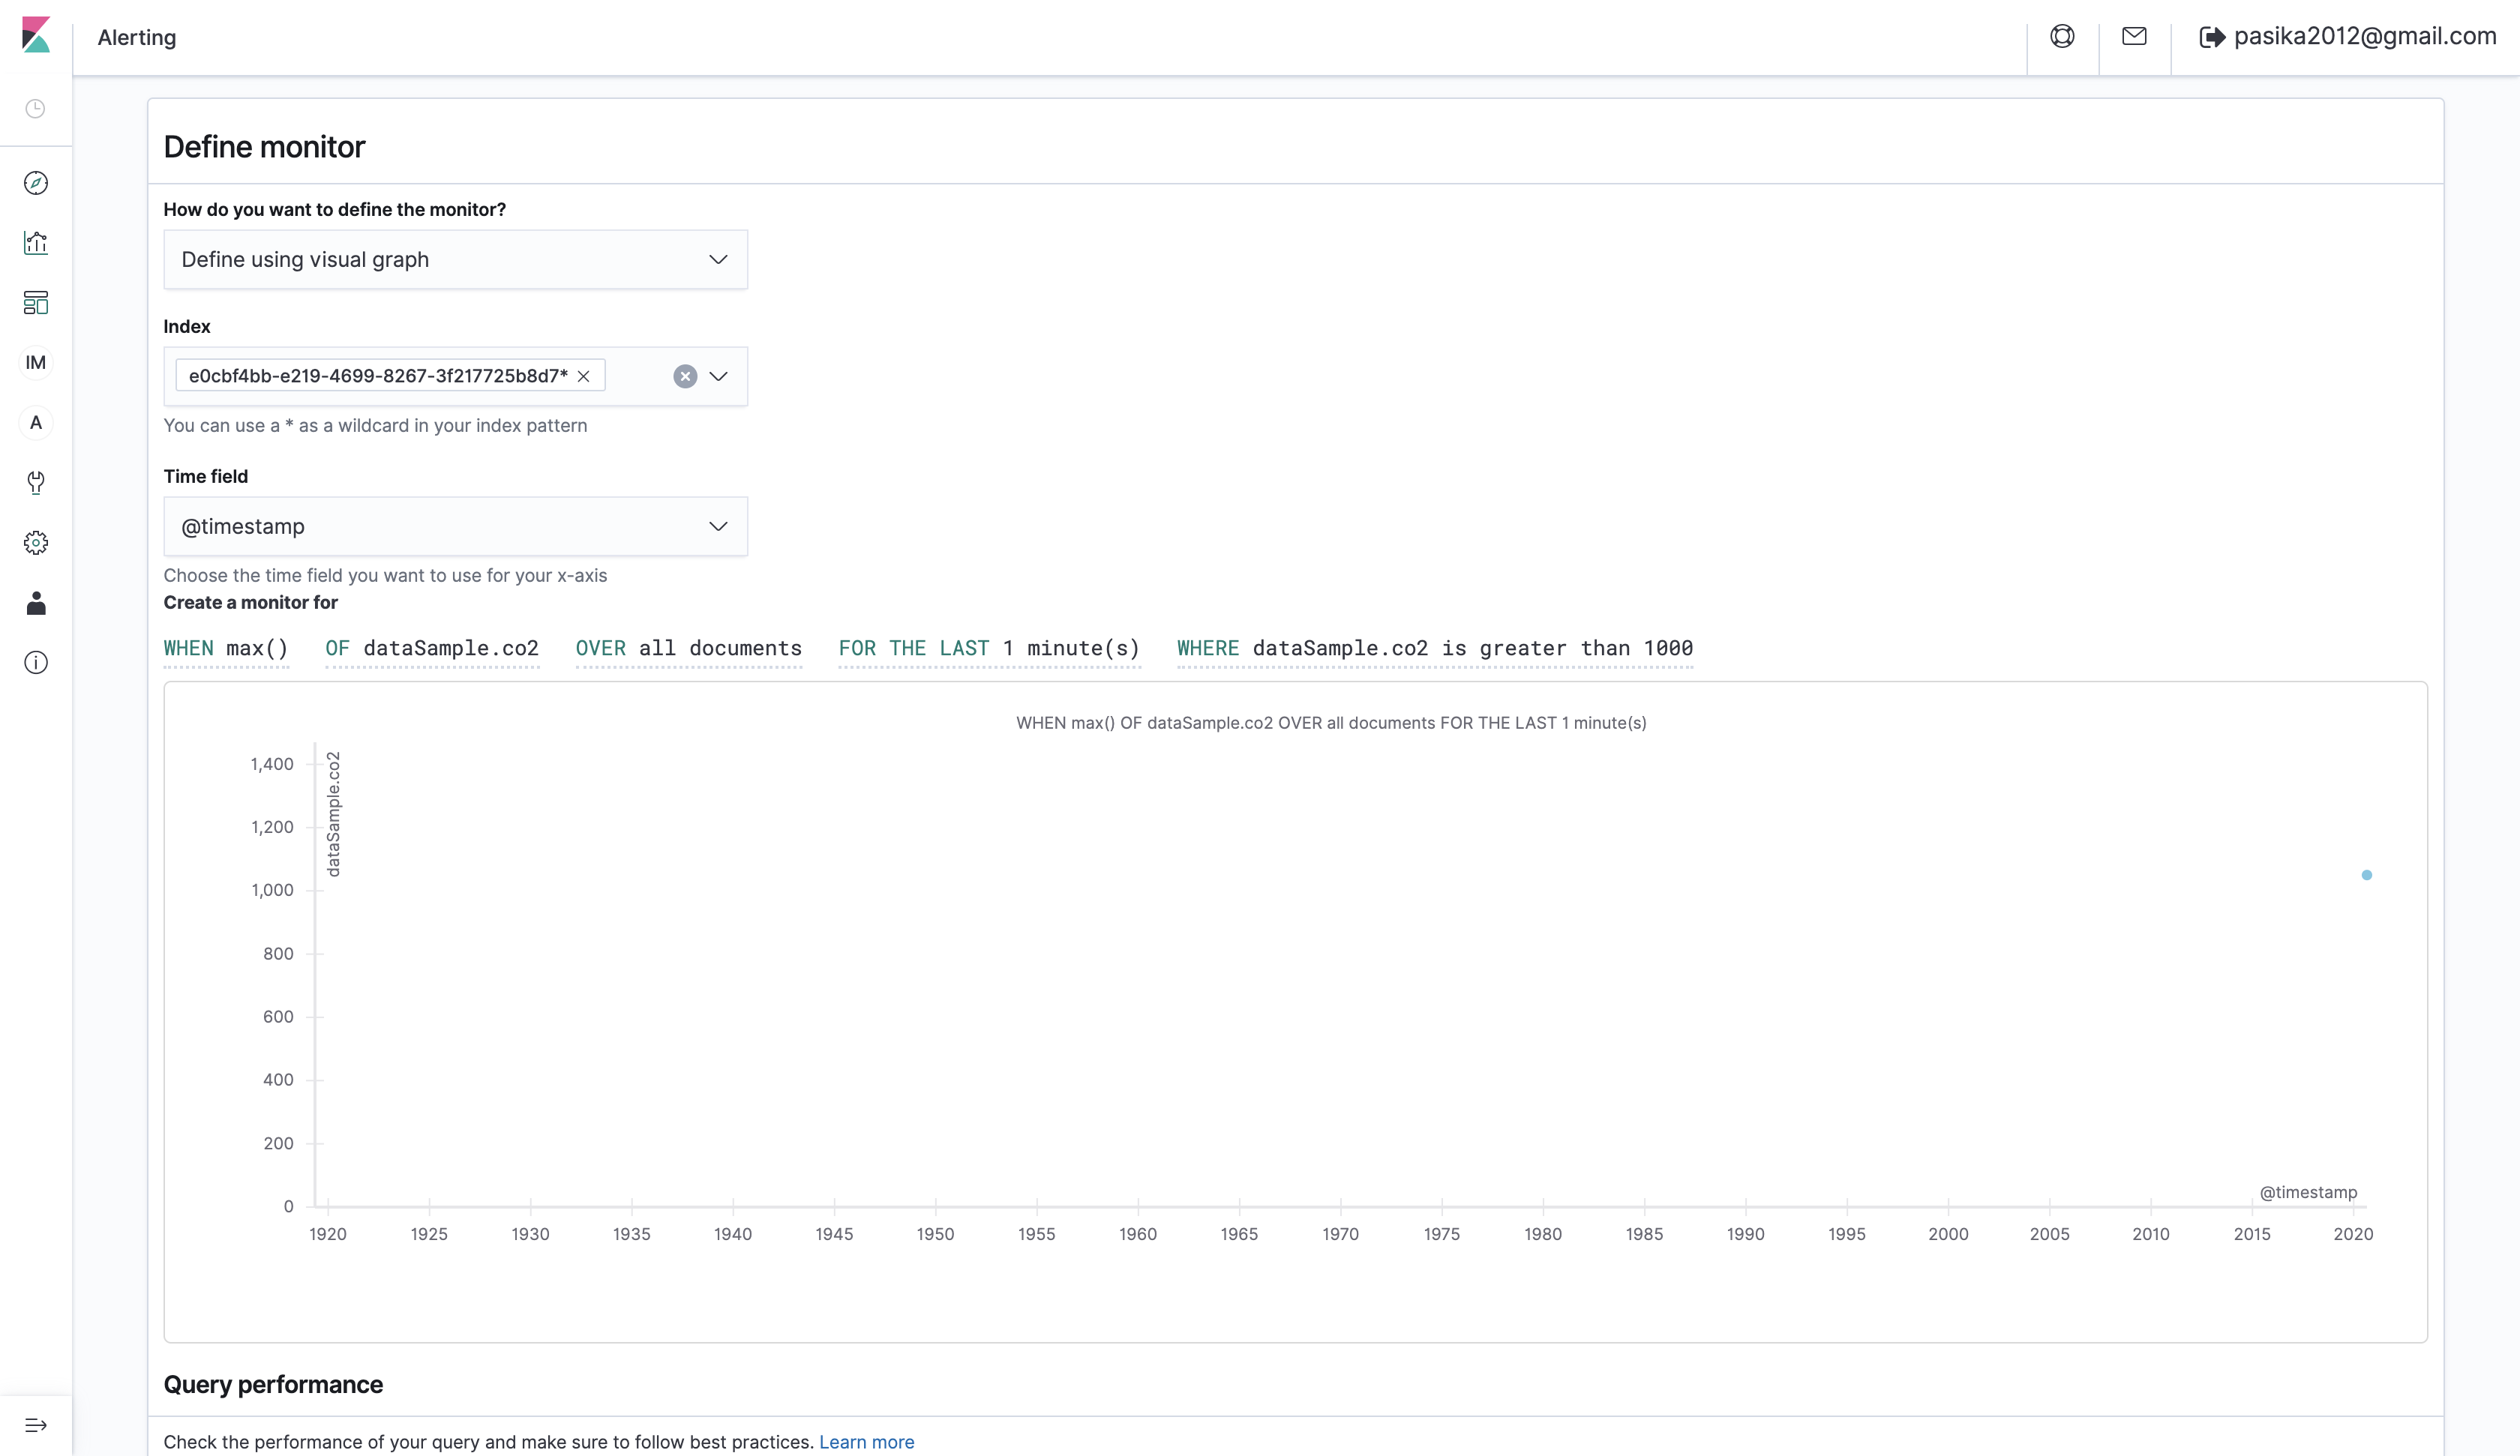
Leave other fields as is and click “Create”.
Create trigger
After creating the monitor, you should be automatically redirected to the trigger definition page. Open Distro triggers are conditions that, if met, generate alerts and can perform some action. More info on Open Distro triggers is here.
Give the trigger a name (e.g., CO2 level trigger); leave severity level as is and define “Trigger condition” as IS ABOVE 1,000.
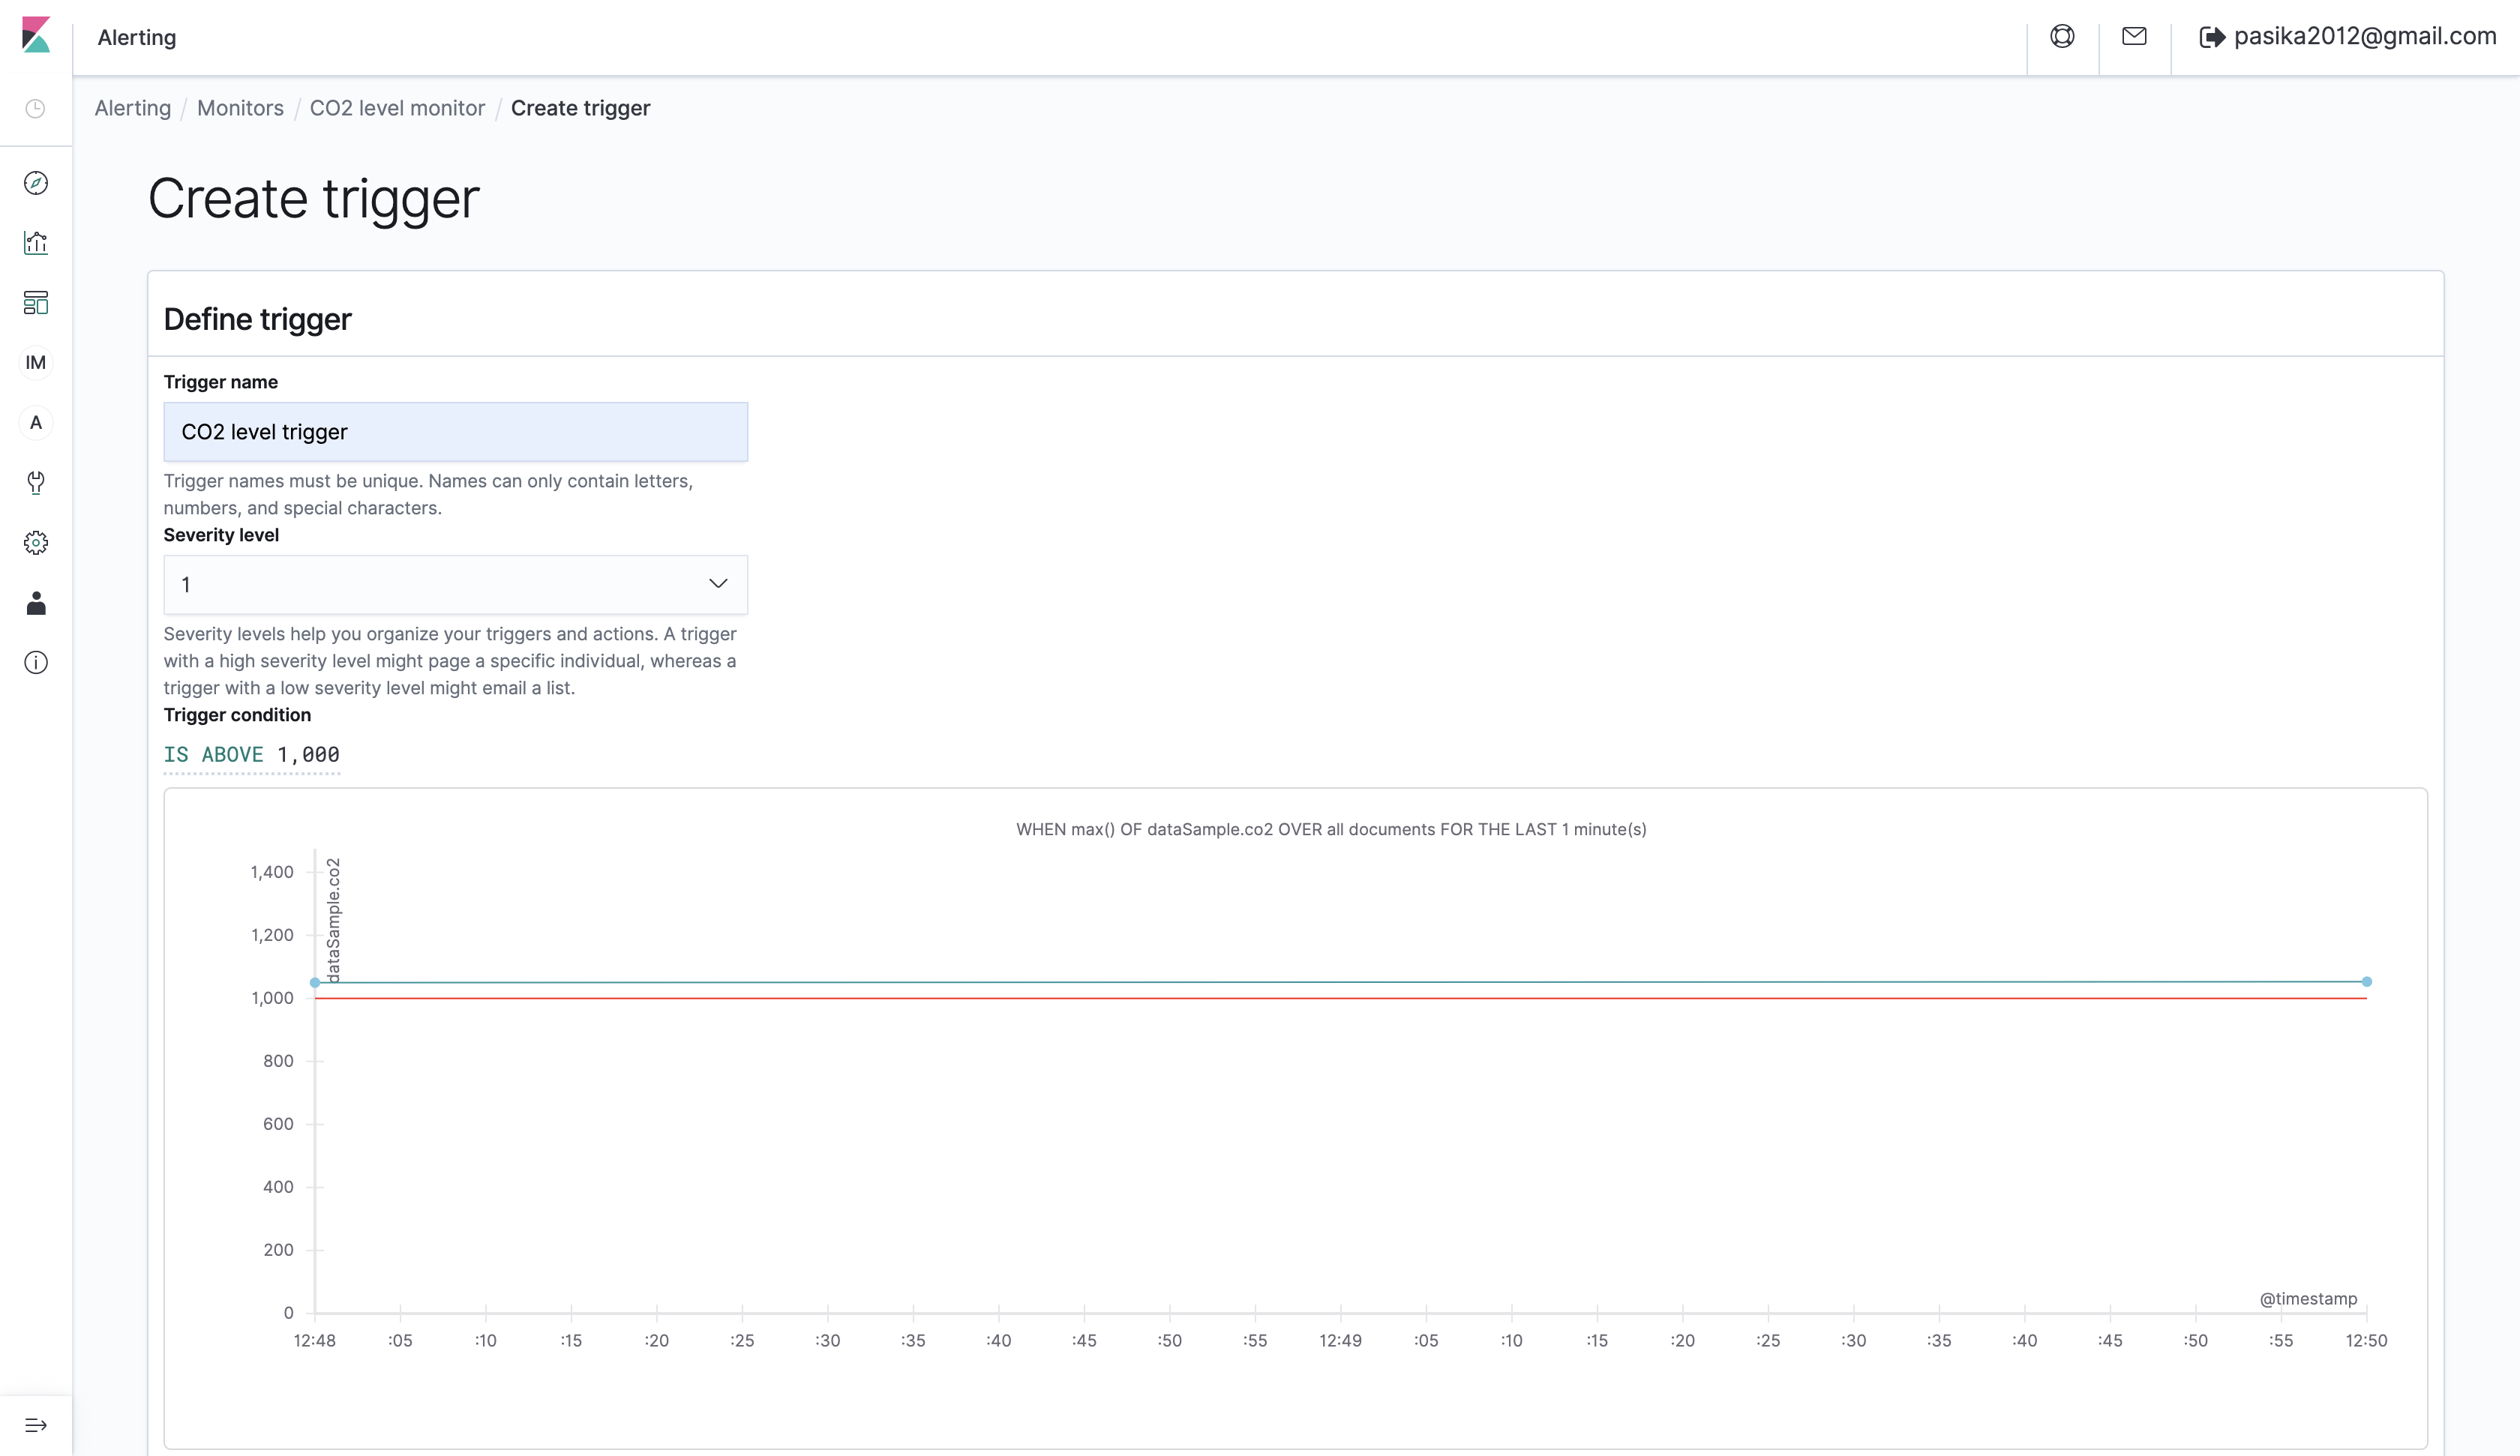
And click “Create”.
Create destination
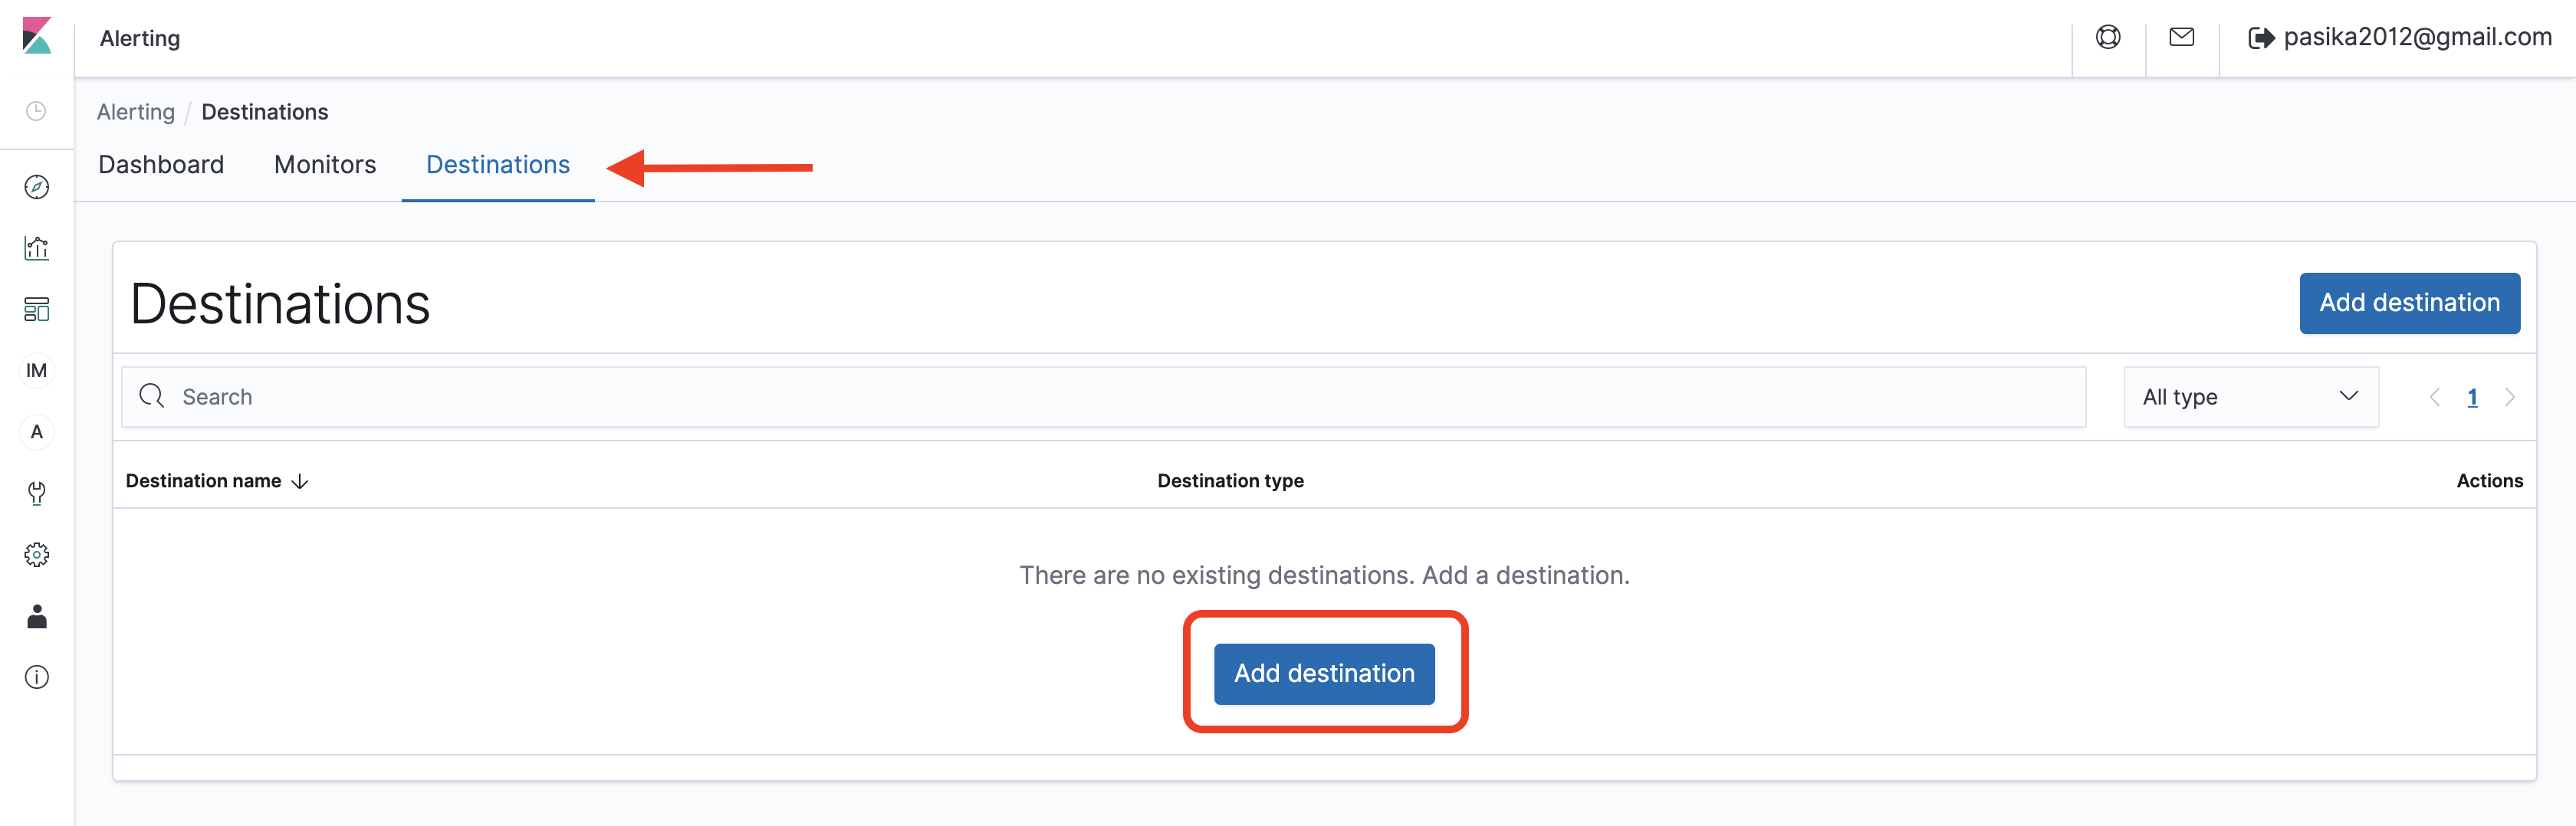
Now create a destination that will be used by the trigger when its condition is met. A destination basically defines where a certain action must be executed by the trigger (we’ll learn how to create actions on the next step). An example of a destination may be Amazon Chime, Slack, or a webhook URL. More info on Open Distro destinations is here. To create a destination, go to the Alerting dashboard -> Destinations and click “Add destination”.
Specify the name for your destination (e.g., Slack destination); select Slack for the “Type” field and paste a Slack webhook URL.
Check out Slack documentation on webhooks.
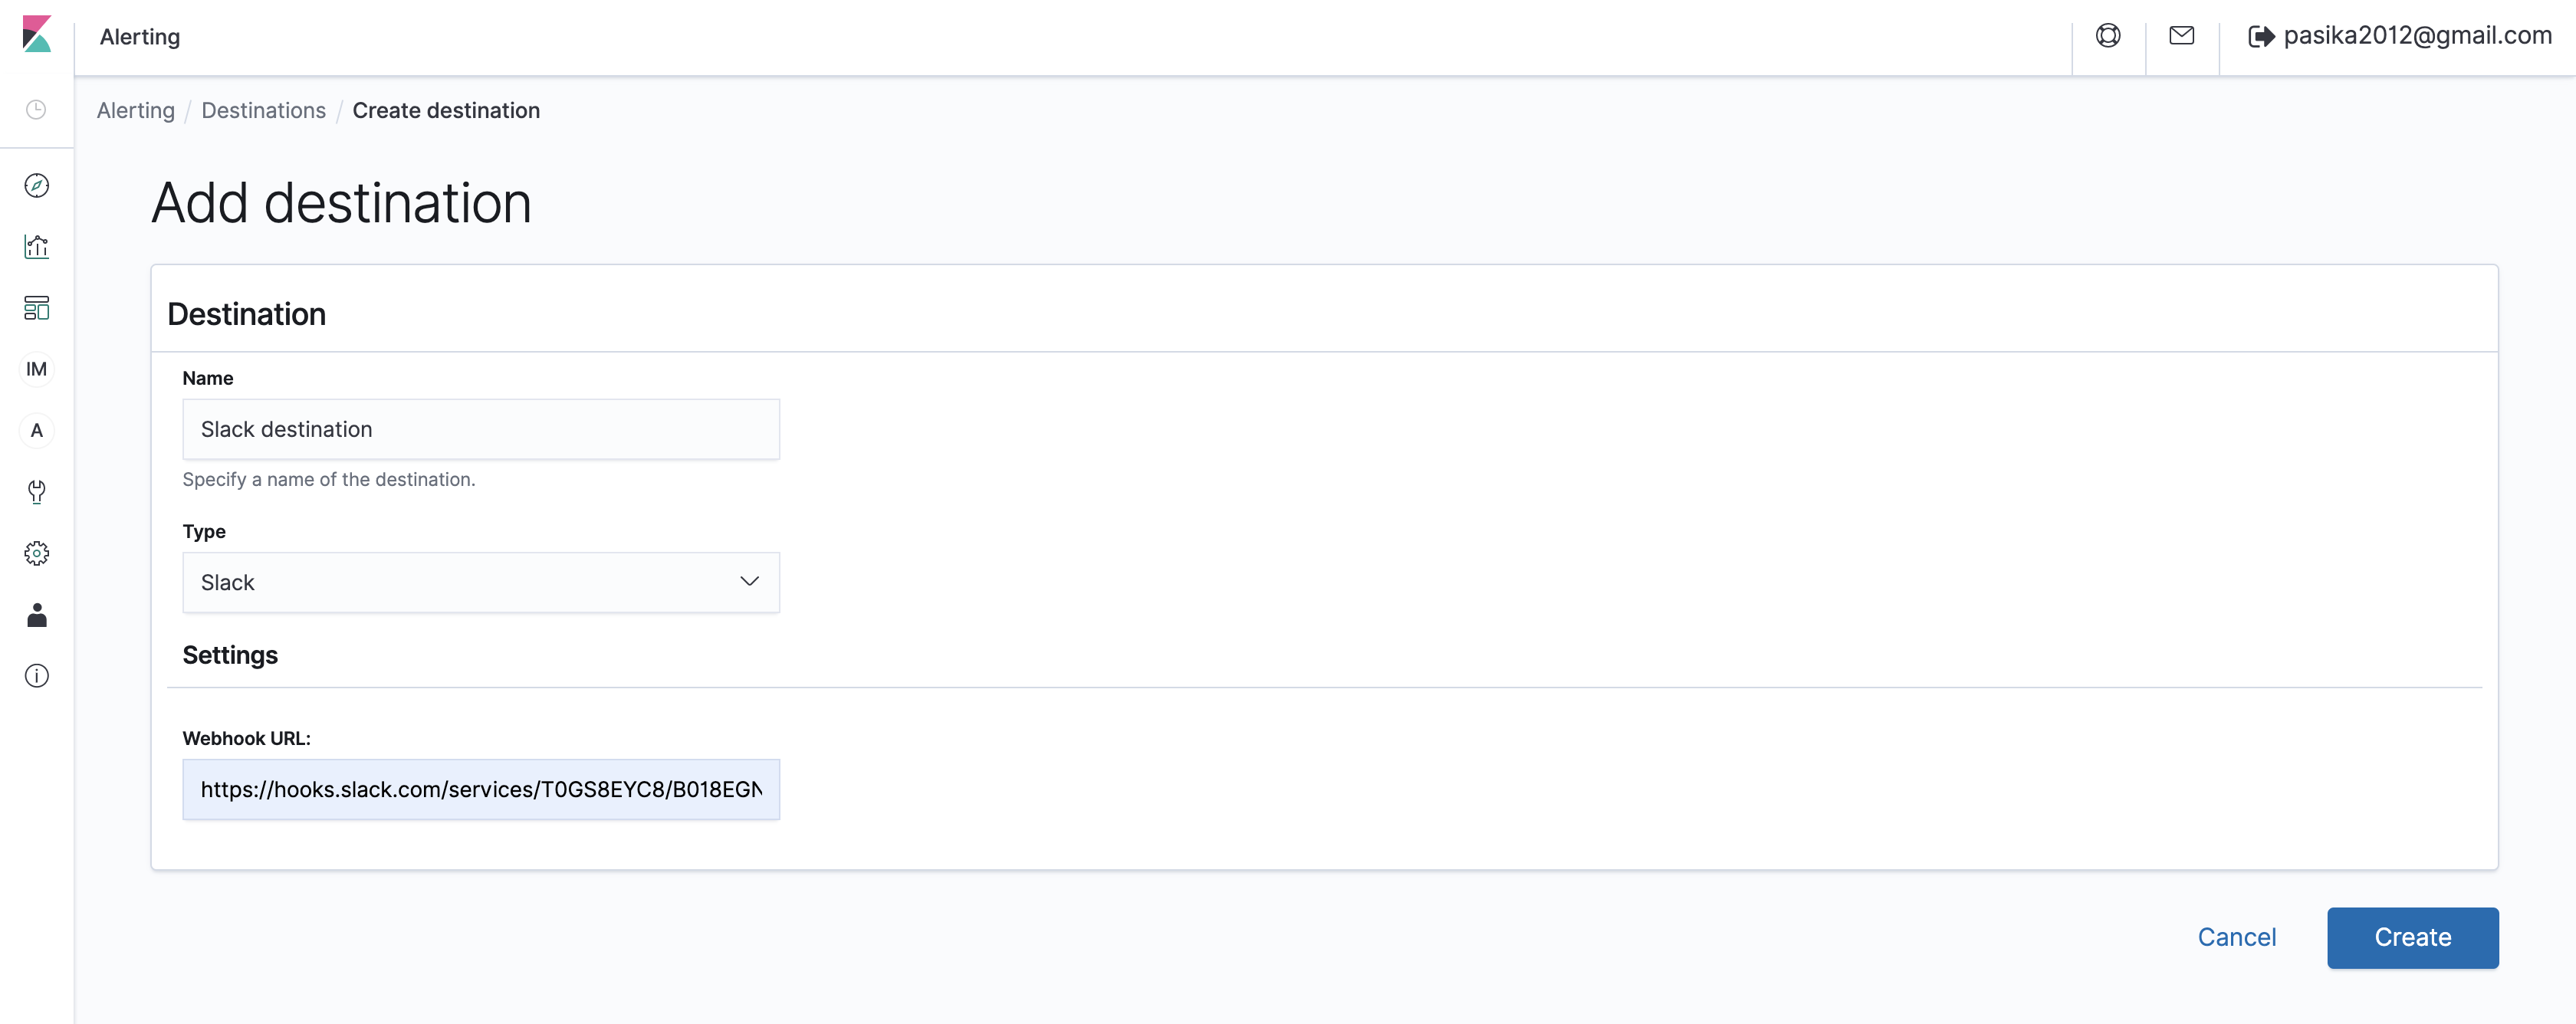
And click “Create”.
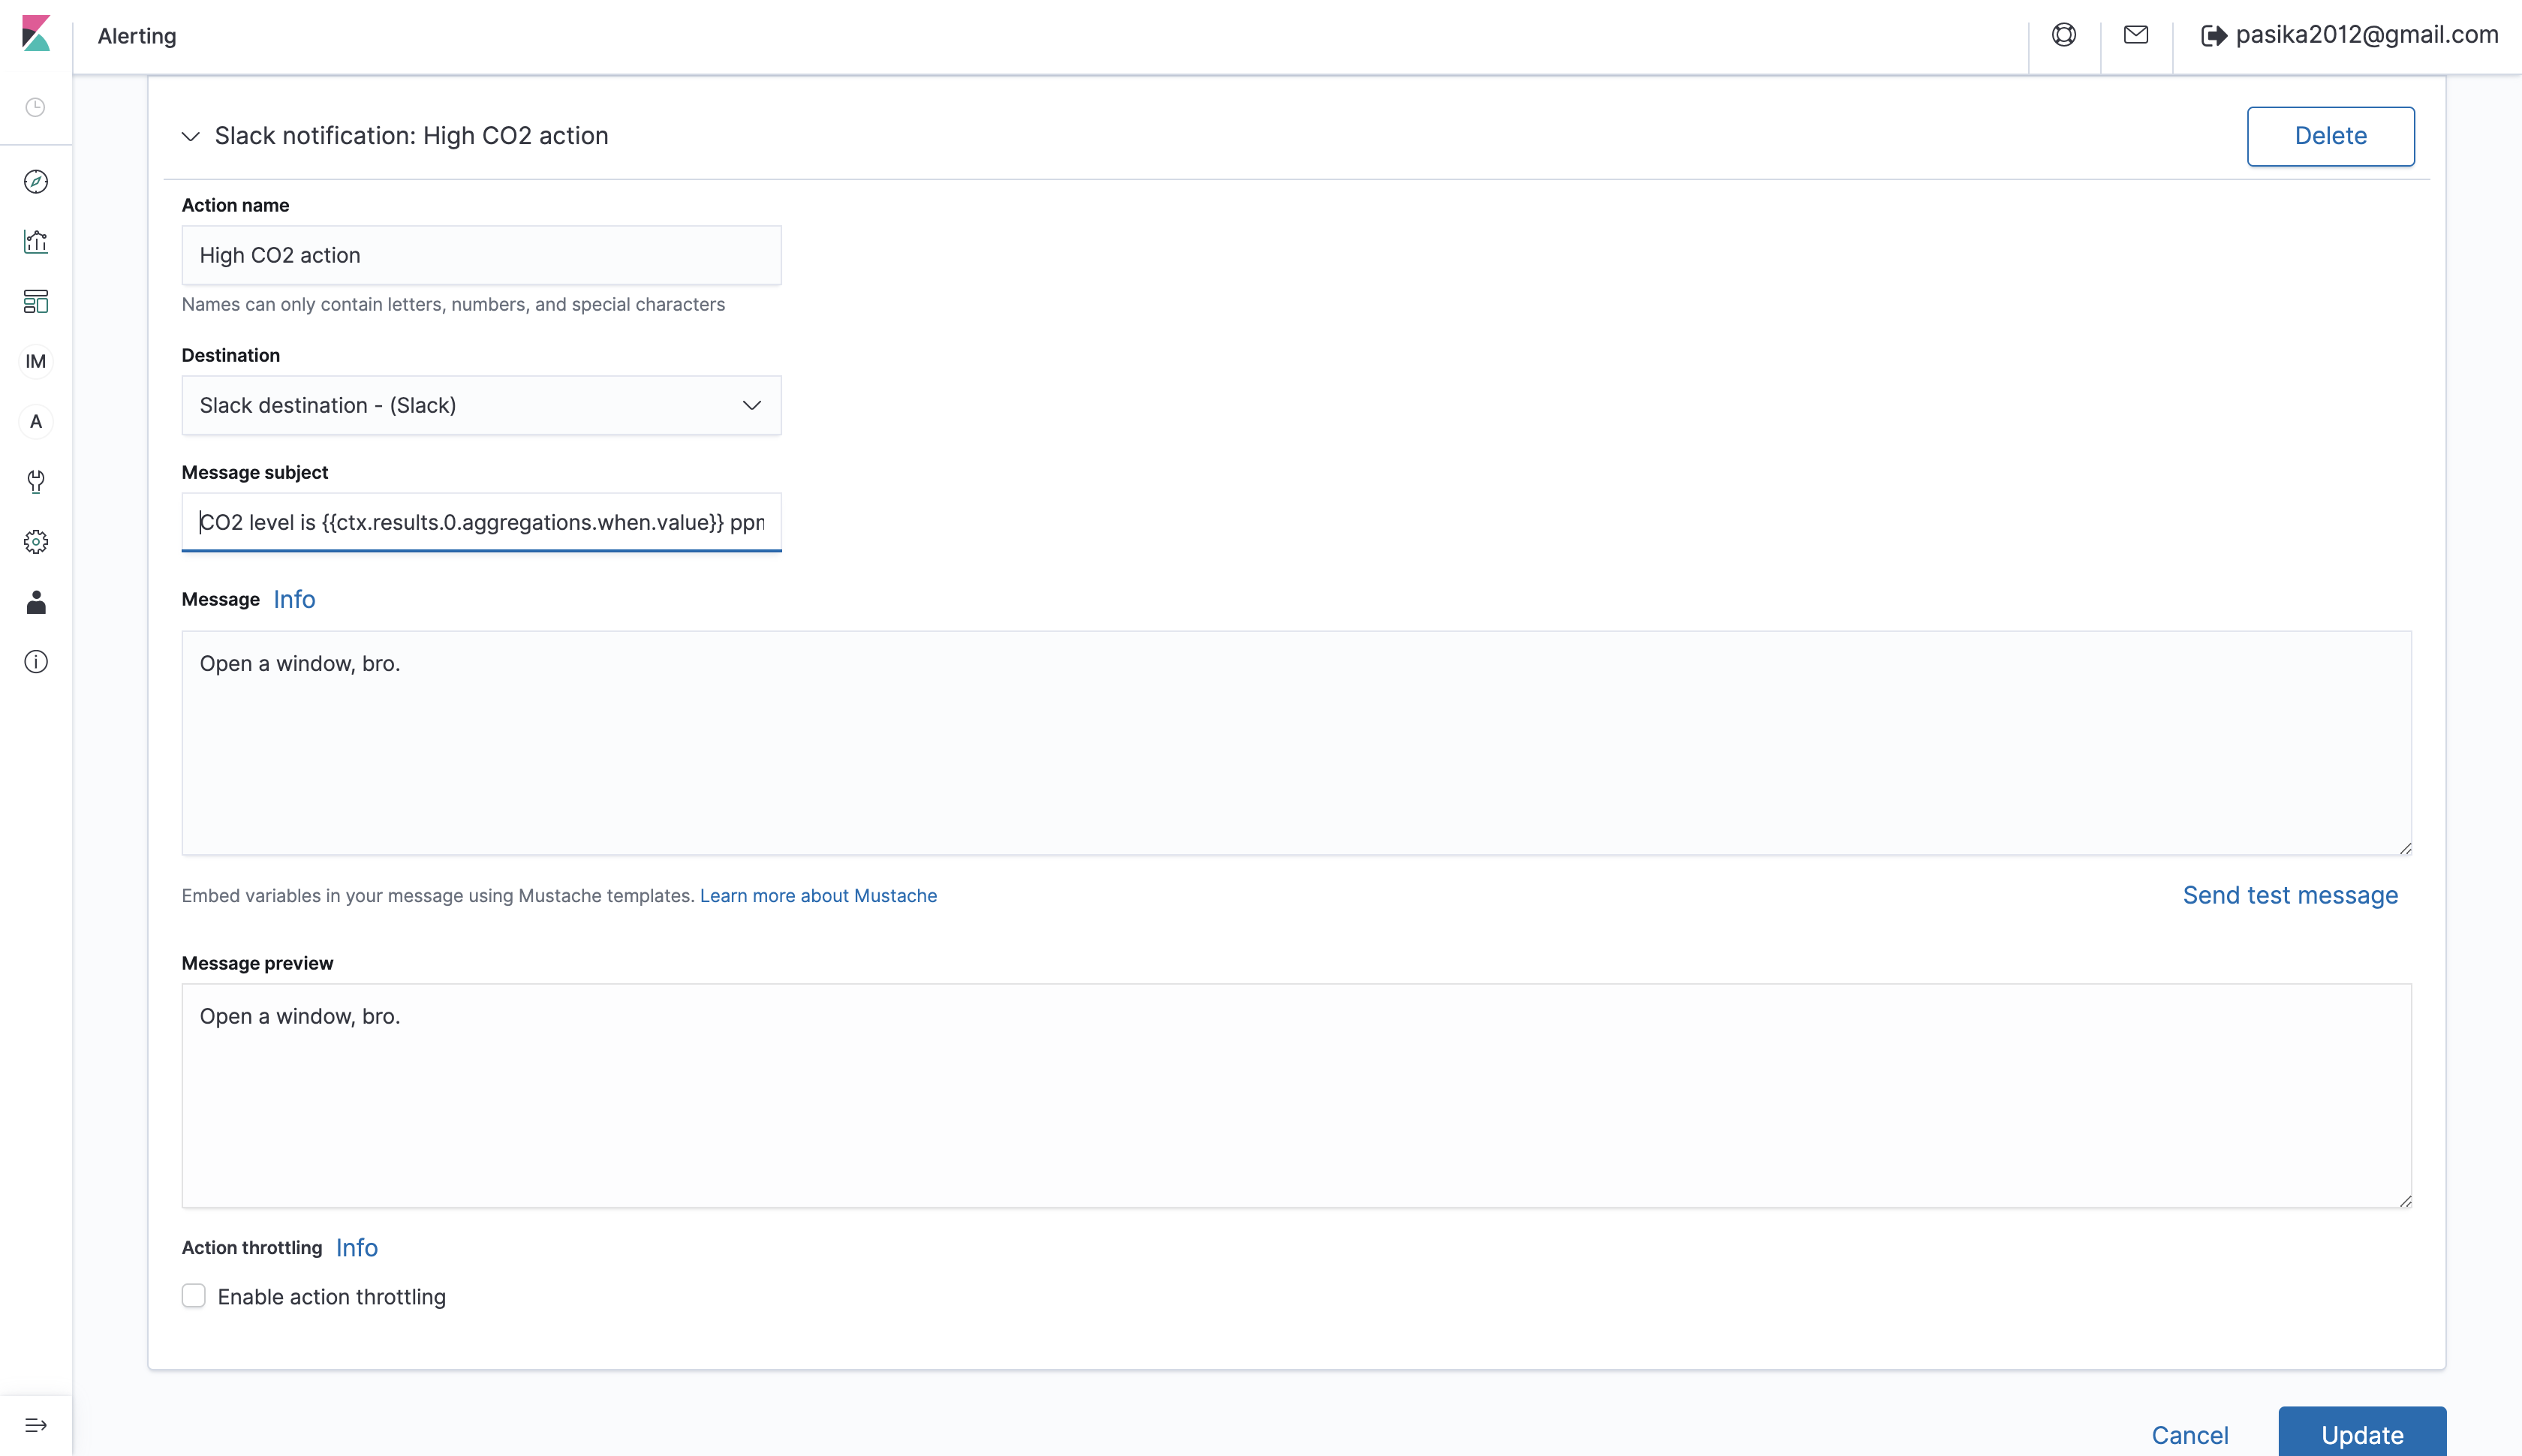
Create action
Now we should configure an Open Distro action. Action is the information that you want the monitor to send out when triggered. Actions have a destination, a message subject, and a message body. More info on Open Distro actions is here.
Go back to the “Monitors” page -> click on the just created monitor -> select the trigger -> click “Edit” -> scroll down and click “Add action”.
- Name the action (e.g.,
High CO2 action) -
Select the earlier created destination
- Enter the Message subject:
CO2 level is {{ctx.results.0.aggregations.when.value}} ppm. Here we used the{{ctx.results.0.aggregations.when.value}}variable with CO2 level value that will trigger the alert. - Finally enter some message in the Message field.
Click “Send test message” and verify that you got notified in Slack.
Now that the action is set up, click “Update”.
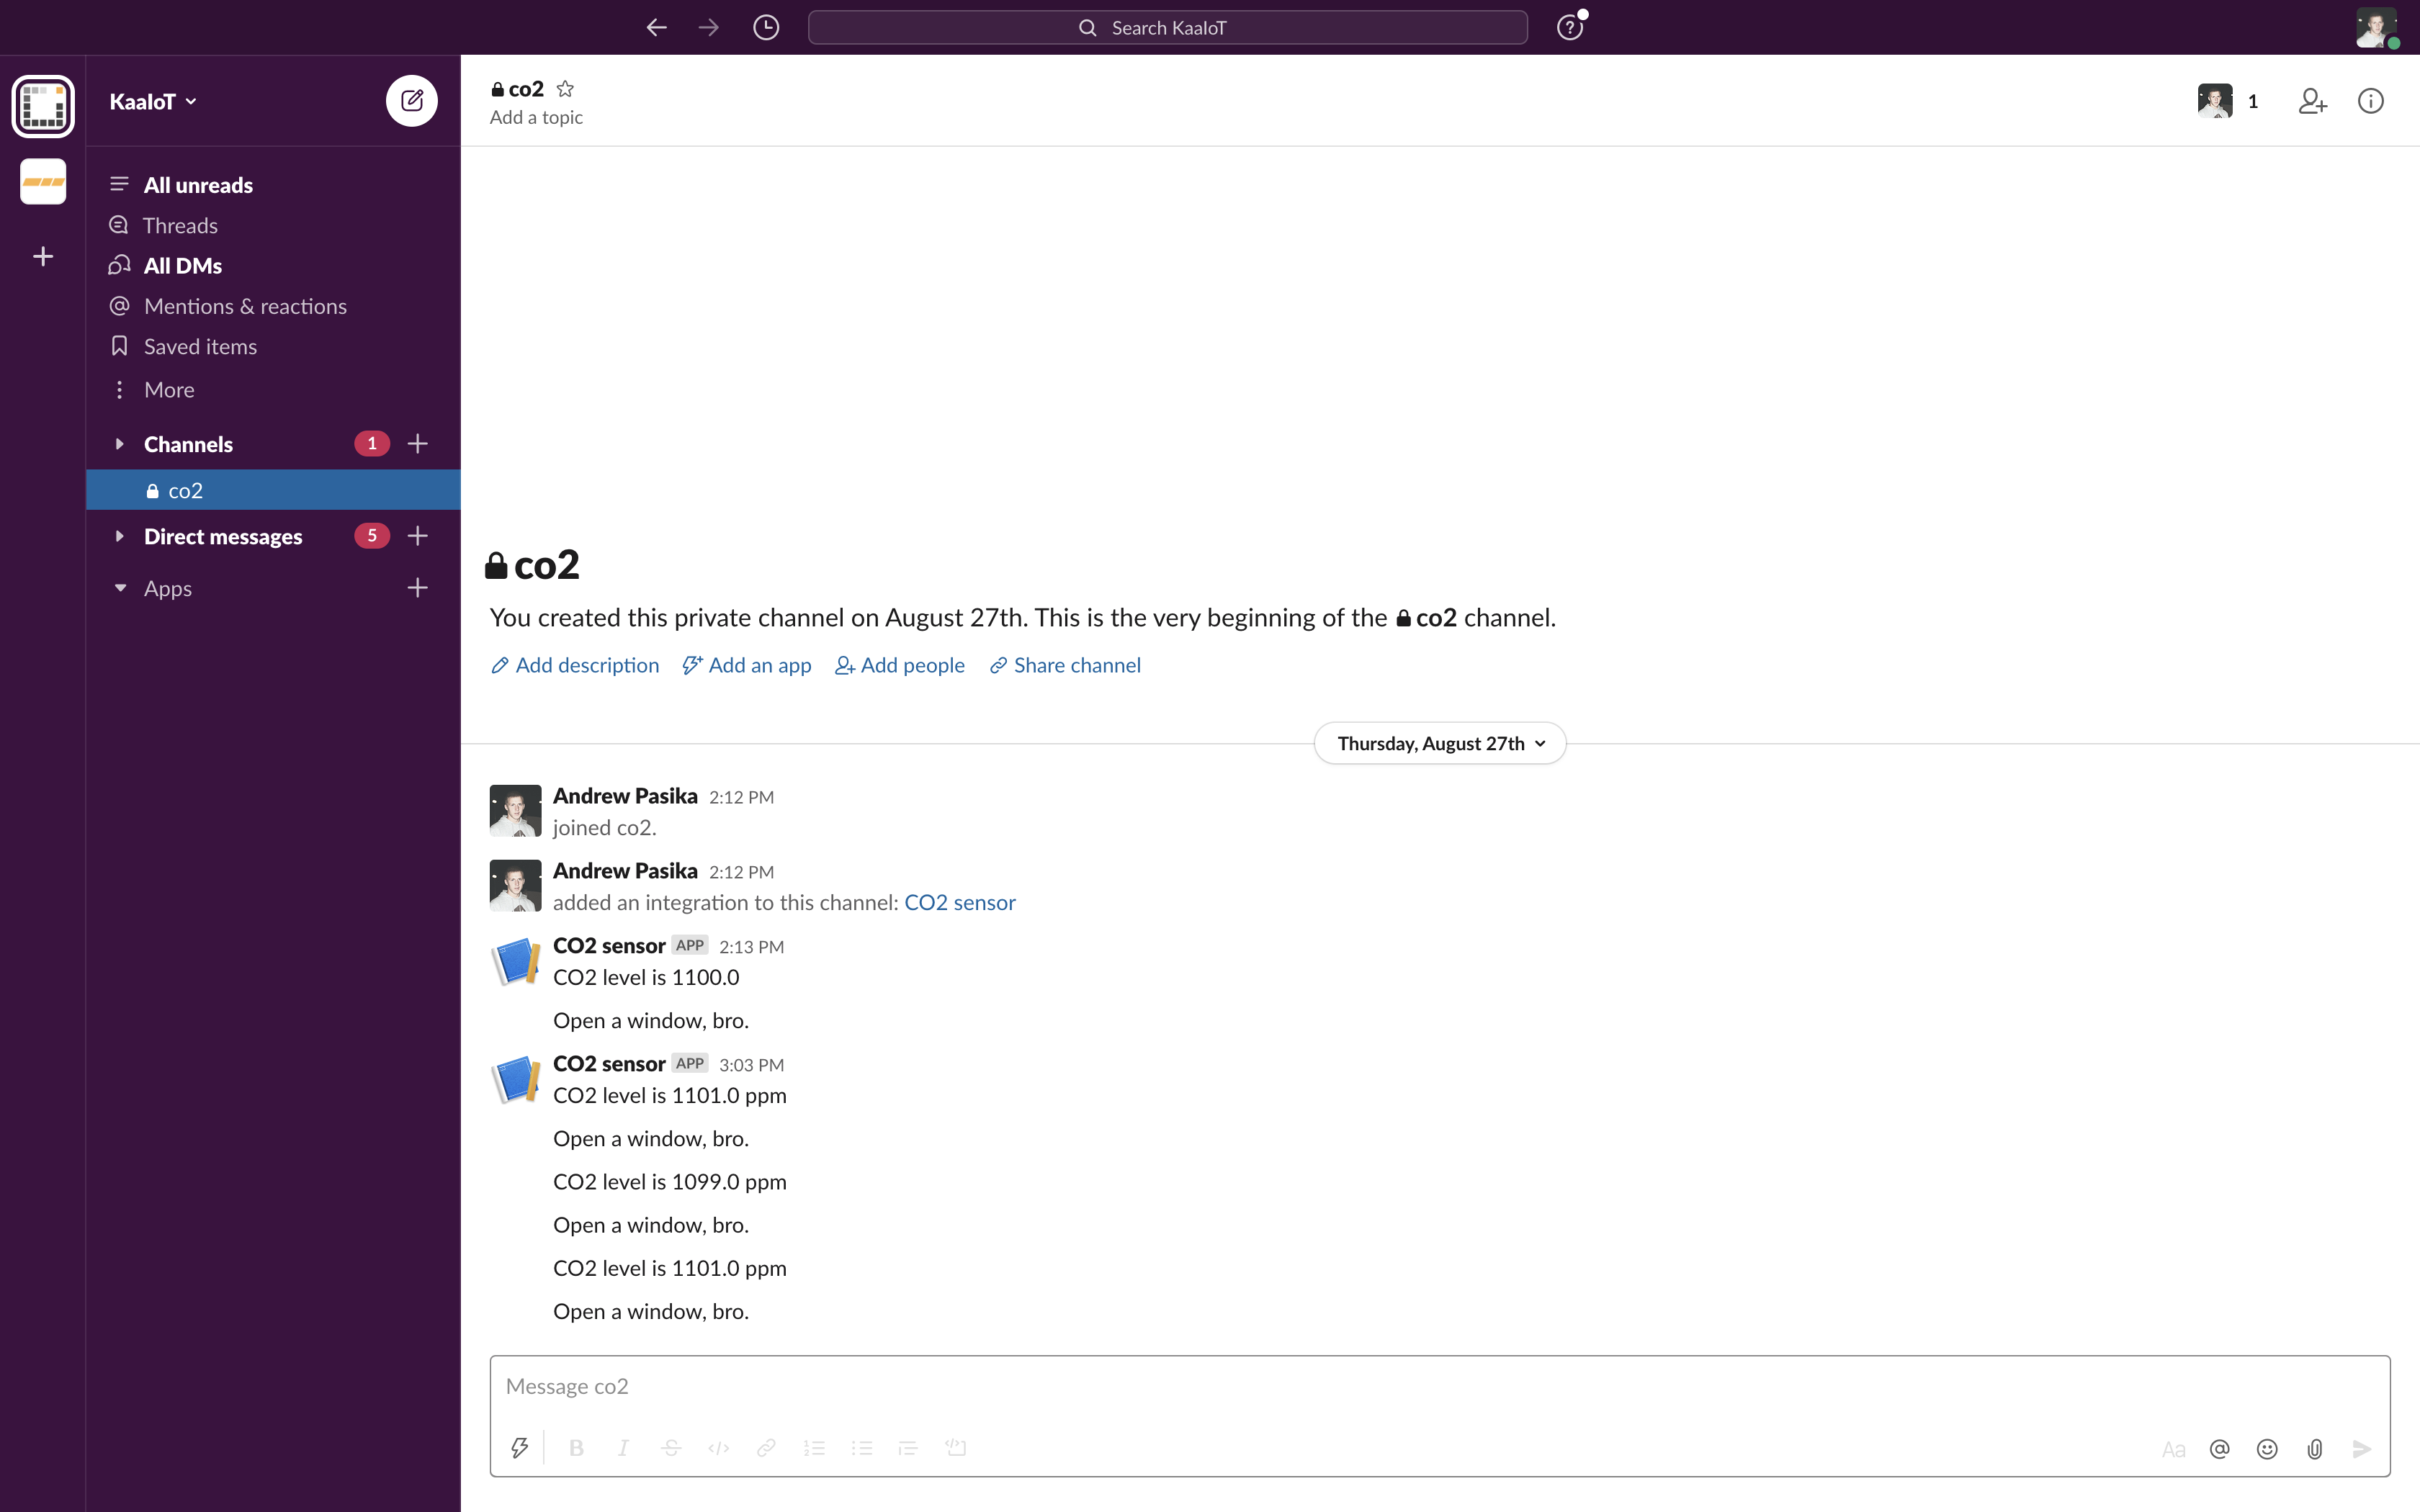
Report high CO2 level
Remember that we defined an alert that sends a notification in Slack when the CO2 level is higher than 1000. Let’s report that CO2 equals 1100 and see what happens.
Simulate a high CO2 level by invoking the next cURL.
Don’t forget to replace <app-version-name> and <endpoint-token> with your application version name and the endpoint token respectively.
curl --location --request POST 'https://connect.cloud.kaaiot.com:443/kp1/<app-version-name>/dcx/<endpoint-token>/json' \
--data-raw '{
  "co2": 1100
}'
Within a minute you should receive a similar notification in your Slack:
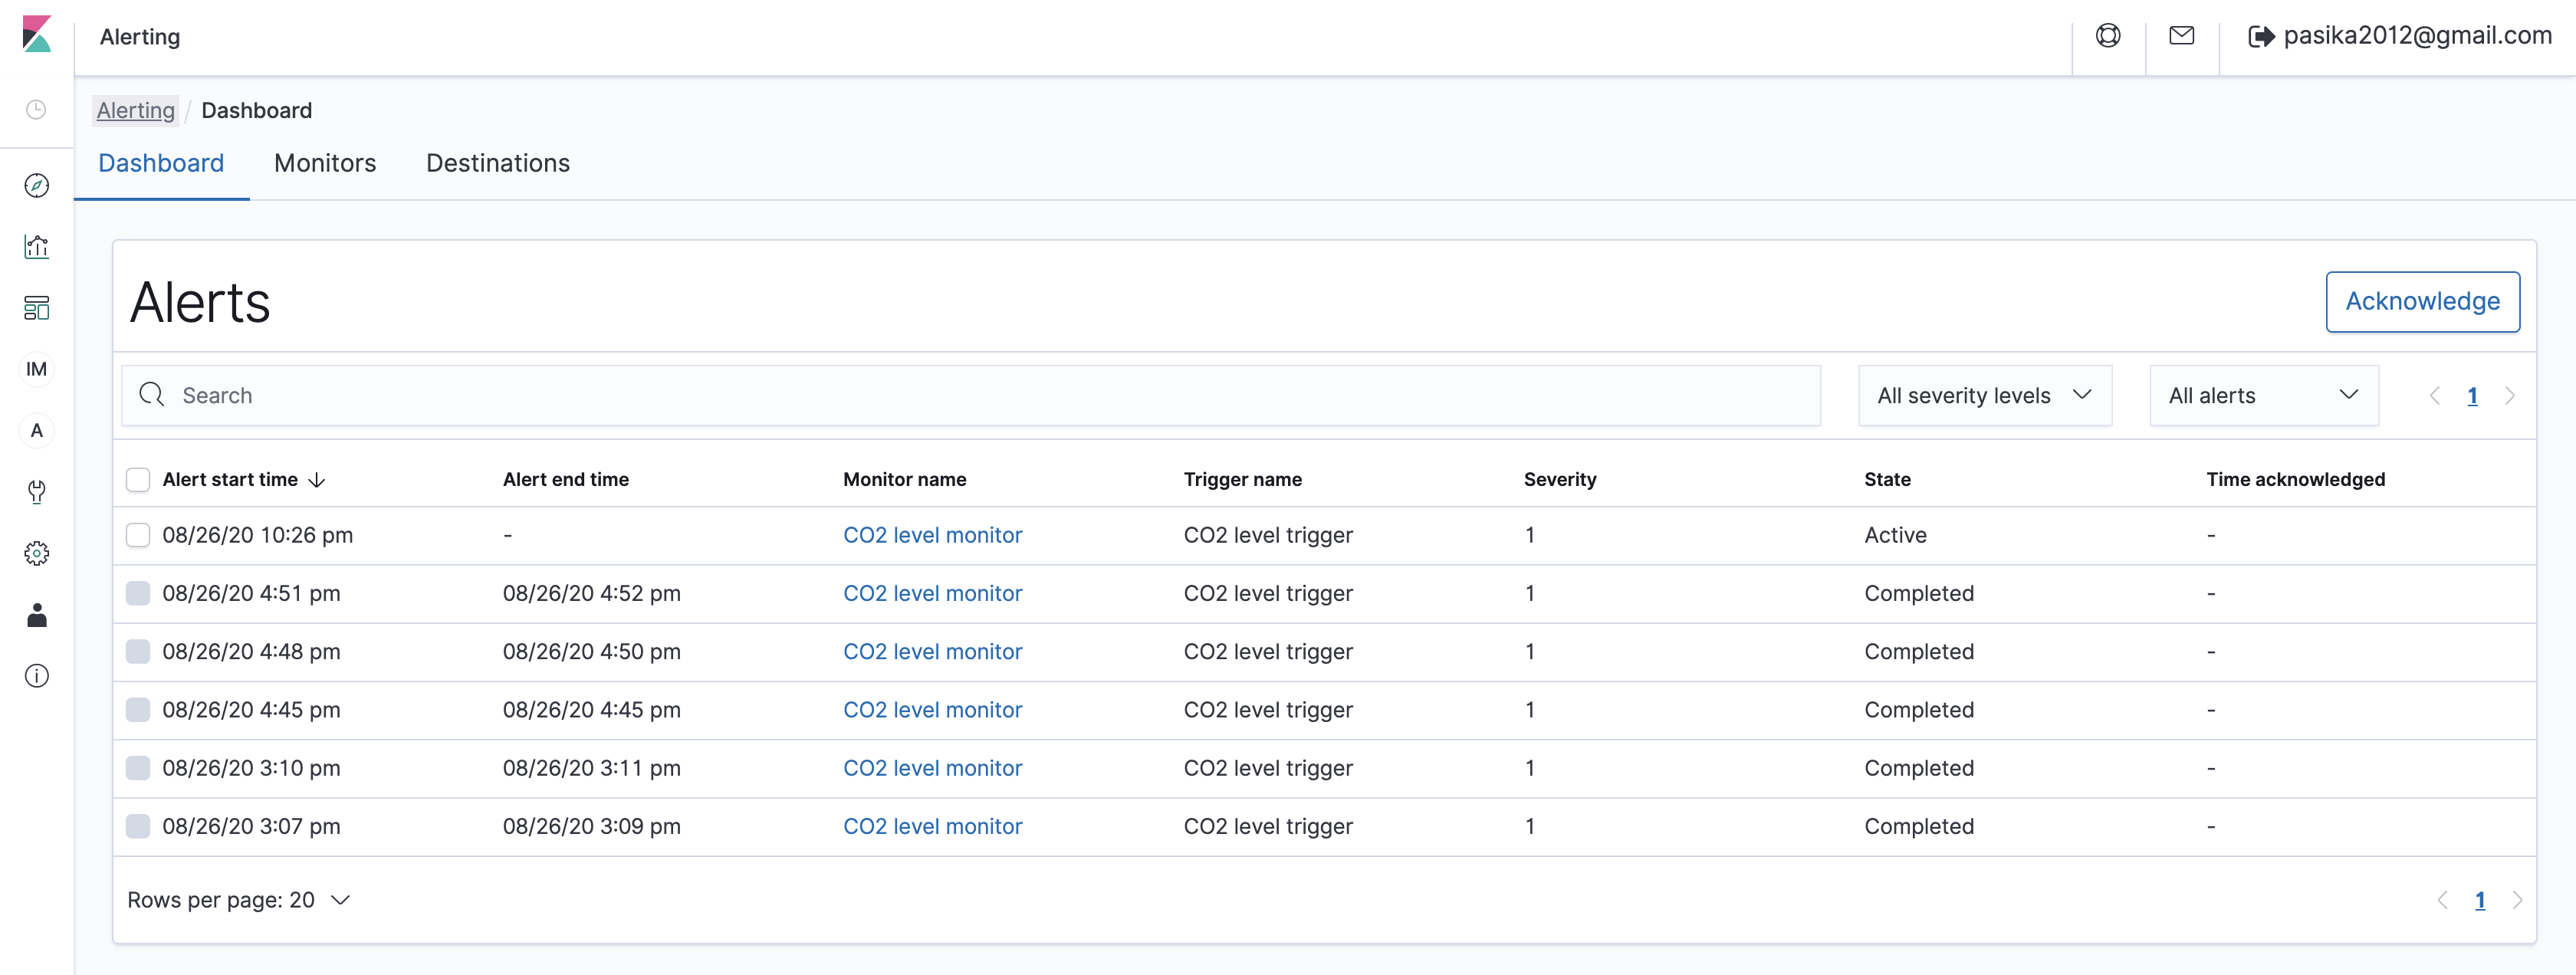
View alerts history
To view alerts history, go to the alerting dashboard.
Learn more
- Check out the webinar where we explained Open Distro analytics and alerts in more details: Data Analytics and Notifications
- Learn Open Distro documentation and get deep insights into your IoT data
Feedback
This tutorial is based on Kaa 1.2 released on July 6-th, 2020. If you, our reader from the future, spot some major discrepancies with your current version of the Kaa platform, or if anything does not work for you, please give us a shout and we will help!
And if the tutorial served you well, we’d still love to hear your feedback, so join the community!